WordPress powers more than 40% of all websites, so it’s no surprise that software vendors and hosting providers are in a race to ensure that you can start work on your WP-based project as quickly as possible. One-click automatic installers are commonplace nowadays, and they can literally get you going in seconds.
Nevertheless, some people still prefer manual installation. They also don’t shy away from editing the wp-config.php file, which, as we’ll find out in a minute, can have a significant effect on the site’s performance and security.
Things to Know Before Installing WordPress
Before you can install WordPress, you’ll need a hosting account. WordPress works with MySQL databases and PHP, and you’ll also need Apache, Nginx, or another web server that supports these technologies.
Your hosting account probably has a control panel and a file manager, which you’ll use to upload the WP core files. Alternatively, you can use either an FTP client or the command-line interface.
A GUI-based database management system can also make your life a whole lot easier. If it’s not included in your plan, you’ll have to manage MySQL via SSH.
These are the prerequisites. So let’s see the actual steps.
WordPress Manual Installation – Step by Step
Manually installing WP may sound like a complex job, but if you follow the logic, you’ll see that it’s hardly rocket science.
1. Create a MySQL user account and a database
Your first job is to set up the database. In addition to it, you also need a MySQL user account associated with it. WordPress will use the account to access your site’s data and display it to visitors.
Most hosting setups give you a point-and-click interface for creating and managing databases. Here, for example, is what you’ll work with if you use an SPanel managed VPS from ScalaHosting:
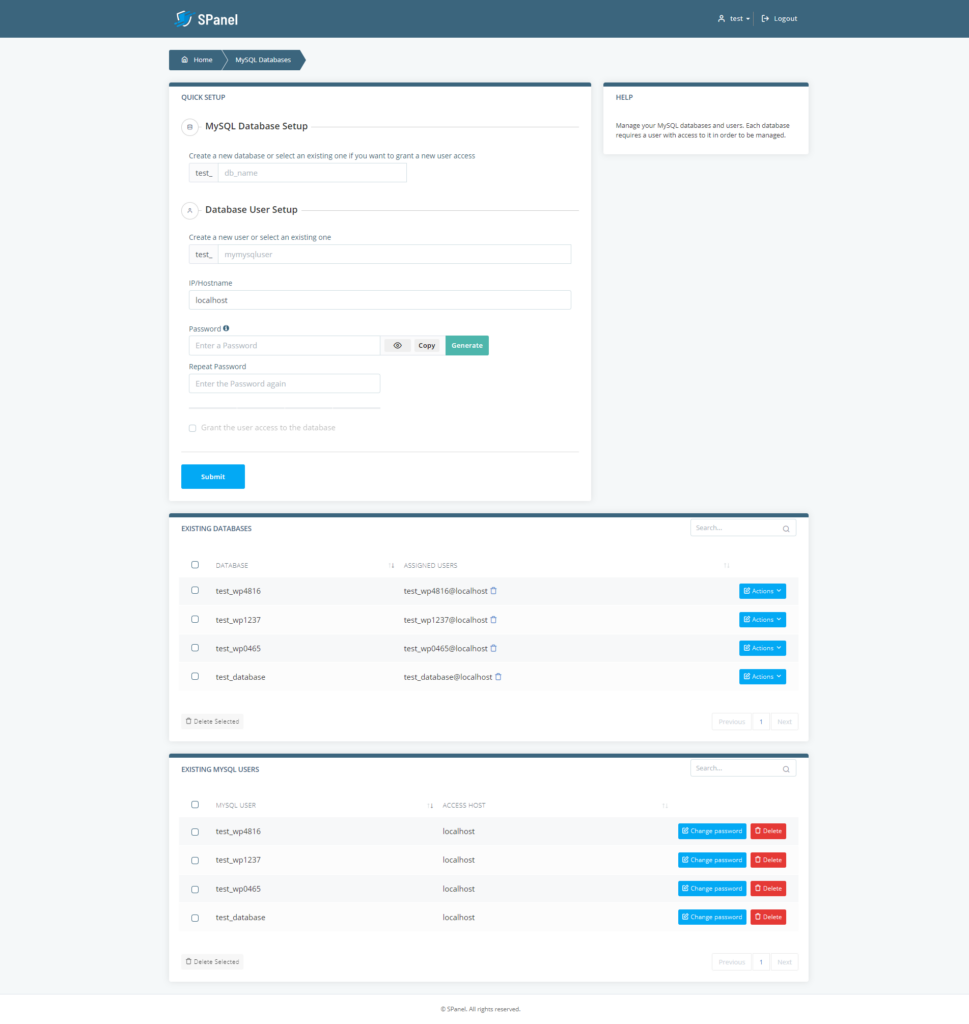
As you can see, you can usually create multiple user accounts and databases. The great thing about GUI-based tools like the ones you see above is that you can create a user account and associate it with a database with no more than a couple of clicks.
2. Download and extract the WordPress core
WP’s latest version is available at https://wordpress.org, and it’s completely free to download and use. It comes as a ZIP archive, which you’ll need to upload to your account’s document root directory (usually, the public_html folder) and extract the files in it.
You can extract the ZIP on your local computer and upload them via an FTP client. However, many people will find it easier to use the control panel’s File Manager and its built-in extracting option.
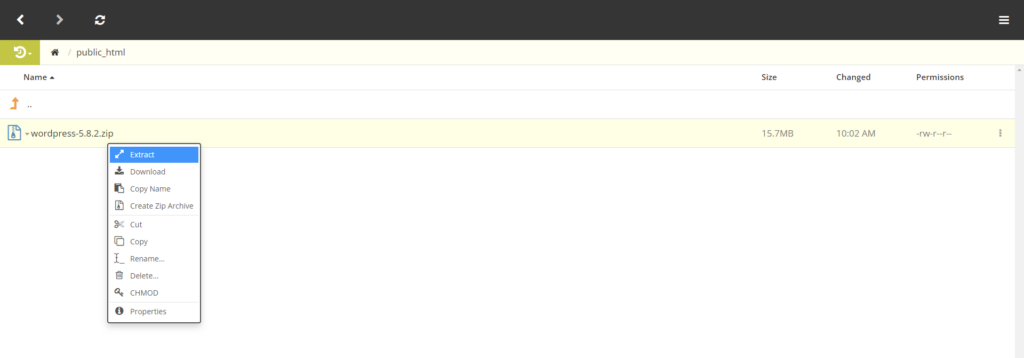
People who feel comfortable working with the command-line can also use SSH, where they have access to WP-CLI – a specialized tool that can streamline the process.
3. Follow the steps in WP’s installation wizard
If you now go to your installation folder, WordPress will present you with a quick installation wizard to help with the final setup. After choosing a language for the interface, you need to configure WP to work with the database you created a few minutes ago.
You’ll need the database name and the MySQL user account’s login credentials. Unless you have a custom setup, you can leave the Database Host and Table Prefix fields in their default state.
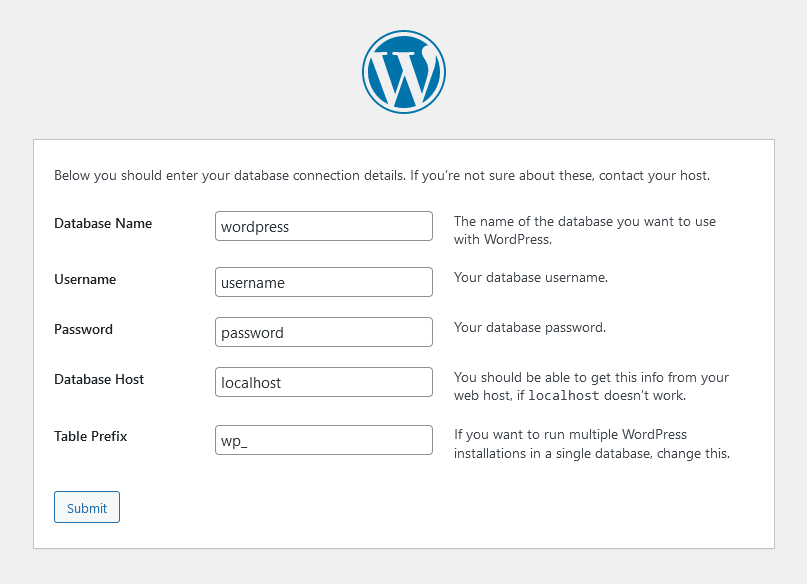
If you have entered the information correctly, the wizard will establish a connection to the database, and you will be able to run the installation.
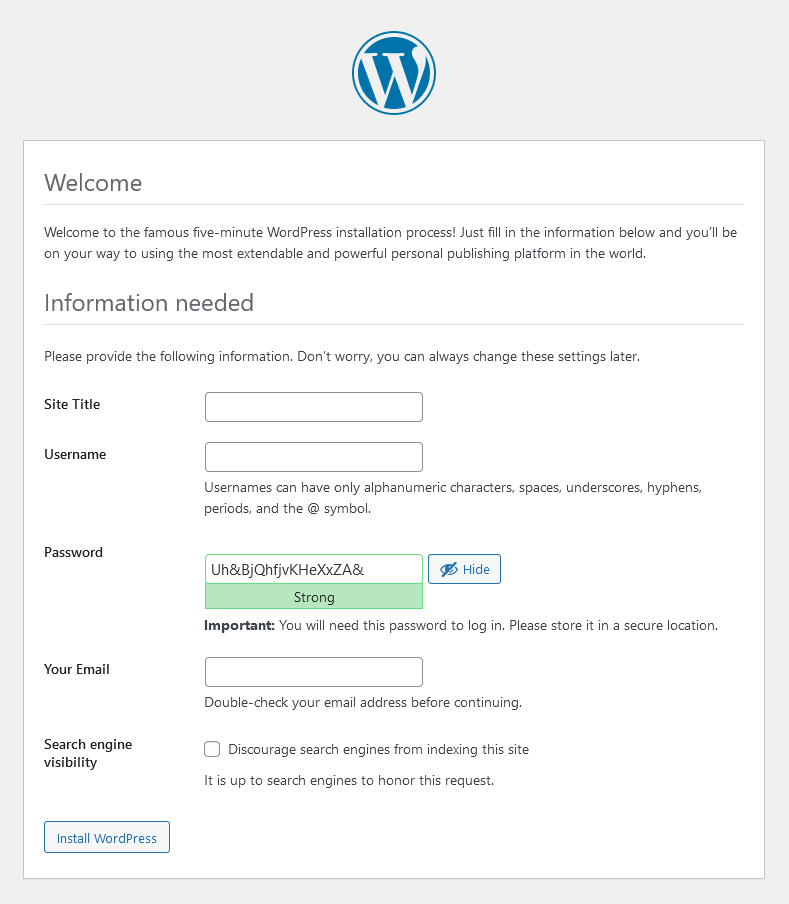
The final step is to set your site title and configure the admin account.
Optimizing the WP-Config.php File
During the installation process you’ve just completed, WordPress has automatically created wp-config.php – one of the main configuration files. You can now log into the WordPress dashboard and start work on your website. However, many people prefer to make some modifications to wp-config.php in an effort to improve their site’s performance, security, and reliability.
There are three options for editing the wp-config.php file:
- You can use an FTP client to download it from the document root directory of your website, edit it with a text editor of your choice on your local computer, and then re-upload.
- You can edit it straight from your control panel’s File Manager.
- You can use SSH and a native text editor like Nano to make the changes on the server.
If your modifications are to work, you need to ensure they’re situated above the “/* That’s all, stop editing! Happy publishing. */” line.
Bear in mind that wp-config.php is a core configuration file. If it breaks, the entire website might stop working, so it pays to create a backup before you continue with the modifications. There’s no shortage of things you can optimize.
Post revisions
By default, WordPress keeps every single edit you make. This can be useful if you need to undo some accidental changes, but from a backend perspective, it’s hardly ideal. Every revision is a database entry, so if you make many changes to your posts and pages, you can quickly bloat the database and compromise the performance.
Thankfully, you can limit the number of stored revisions or disable them altogether.
To limit the number of revisions WP keeps to three per post, enter the following line in wp-config.php:
define( ‘WP_POST_REVISIONS’, 3 );
If you prefer not to store any revisions at all, you can use the following line:
define( ‘WP_POST_REVISIONS’, false );
WP’s autosave interval
While you’re editing a post, WordPress automatically saves your changes once every 60 seconds. This is convenient if you use the block editor to compose and format your content. However, it’s not much use if you write the text locally and use the WordPress dashboard only to publish it. At the same time, all this automatic saving generates database queries and additional load.
Luckily, you can tweak WP’s autosave interval depending on your needs. For example, if you want to make WordPress automatically save your work every 180 seconds, you need the following line in the wp-config.php file:
define(‘AUTOSAVE_INTERVAL’, 180 );
File editing
The damage could be pretty scary if an unauthorized user gains access to your WordPress dashboard.
For example, if a hacker accesses your dashboard, they get pretty much unlimited control over your files.
They can install or update themes and plugins and inject malicious code, which allows them to use your site as a launchpad for additional attacks on other targets. You can’t completely eliminate the consequences in case of a hack, but you can minimize the damage.
Using a single line in the wp-config file, you can prevent unauthorized edits and updates to your files, themes, and plugins.
define( ‘DISALLOW_FILE_EDIT’, true );
Bear in mind that the line above will also disable the plugin and theme editors available in the WordPress dashboard.

Defining the home and site URL
During the initial installation, your website’s home and site URLs are entered into the database, and every time a plugin or a theme needs to access them, it sends an SQL query. This happens more often than you might think, and processing all these queries may end up using a significant amount of hardware resources.
Defining the home and site URLs in the wp-config.php file will lower the load on the database and improve the performance. Here’s what you need to add:
define(‘WP_HOME’, ‘http://www.yourdomain.com’);
define(‘WP_SITEURL’, ‘http://www.yourdomain.com’);
Emptying the trash more frequently
If you want to remove a WordPress post or a comment, you don’t purge it straightaway. Instead, you first move it to the trash, from where you can delete it permanently. That way, you can be sure you won’t delete anything by accident.
Items in the trash (and their database entries) are kept for 30 days by default, but you can lower that period if you want to keep the database clean.
For example, if you wish to delete posts in the trash after a week, you need to add the following line to the wp-config.php file:
define(‘EMPTY_TRASH_DAYS’, 7 );
You can also disable the trash feature altogether by swapping the “7” in the line above with “0.”

Increasing PHP’s memory limit
A low PHP memory limit can lead to server errors and the white screen of death. It’s usually configured via the php.ini file, but if you don’t have access to it, you can use wp-config.php.
Here’s what you need to enter if you want to set it at 512MB:
define(‘WP_MEMORY_LIMIT’, ‘512M’);
Conclusion
There are easier ways of setting up WordPress, but doing it manually isn’t exactly rocket science. What’s more, you stand a better chance of understanding how WP works. With that knowledge, you’ll see how modifications to the wp-config.php file can improve your site’s performance and security.
FAQ
How difficult is it to install WordPress manually?
Modern one-click installers can set up WordPress in seconds. However, even the manual installation isn’t something you need to be scared of. It boils down to uploading and extracting the WP core, setting up a database, and configuring the two to work together. If you’re careful, you’ll struggle to get it wrong.
What is wp-config.php?
Wp-config.php is one of WP’s core configuration files. It hosts many of the settings related to your WordPress installation, including the details that help the content management system communicate with the database.
How do I access the wp-config.php file?
The wp-config.php file is usually located in your website’s document root folder. If you have FTP access, you can download and edit it on your local computer. Alternatively, you can use either SSH or your control panel’s file manager to modify the file directly on the server.

