Although it enables people with no technical skills to build their own personal websites, WordPress was never targeted exclusively at complete novices. It’s a powerful content management system that gives you the freedom to build and manage functional websites with numerous useful features and a great user experience. It’s suitable for both big and small projects, and it gives site owners access to tools that can improve the workflow and make administration a lot easier.
WP-CLI is one such tool.

What is WP-CLI?
People associate WordPress with the famously user-friendly WP dashboard. This is where you can change the website’s settings, install, activate, and delete themes and plugins, and manage your content. The dashboard is easy-to-navigate around, and all the utilities for managing the website are organized in a single point-and-click interface.
However, as convenient as it is, the dashboard may not be the best way of carrying out some day-to-day site administration tasks. For many people, WP-CLI is a faster, more efficient alternative.
WP-CLI is the official command-line interface for WordPress. You can do pretty much everything you do with the dashboard, but instead of clicking the mouse on buttons and menus, you write commands and execute them.Many of you may be struggling to grasp how this could be a more efficient way of managing a website.
Well, you may not be surprised to learn that WP-CLI was built with experienced site administrators in mind. Because they’ve worked with a command-line interface in the past, they have an easier time understanding the logic behind the commands, which, in turn, helps them make the most of WP-CLI. And the truth is, WP-CLI is quite a powerful tool.
For example, if you’ve built dozens of WordPress websites already, you likely have a selection of plugins that you want to install at the very beginning of starting a new project. If you use the dashboard, this would mean setting up and activating all the add-ons one by one. With WP-CLI, it can all happen with a single command.
It can be an enormous time-saver, and the truth is, although the command line interface may seem a bit daunting at first, once you grasp the commands’ syntax, you’ll realize that WP-CLI is not that difficult to use.
Even if you don’t find it particularly convenient and prefer to stick with the dashboard, getting to know it will help you learn more about how your website works.

What Do You Need to Use the WordPress Command-Line Interface?
Most likely, the server hosting your website runs on Linux, so to access its command-line interface, you’ll need to use the SSH protocol. Accessing the server via SSH no longer requires any additional tools. Old versions of Windows don’t support SSH out of the box, and establishing a connection from them is only possible via a dedicated client.
However, due to user demand, Microsoft introduced native SSH support with a Windows 10 update from 2018. Unless you’re using a Windows version older than that, you should be able to log into your server via the PowerShell utility. Linux and macOS users can simply use the Terminal.
How Do You Access The WordPress Command-Line Interface?
Establishing an SSH connection to the server is usually pretty easy, especially if your domain name is pointed correctly. After opening PowerShell or the Terminal, you’ll need to write a command using the following pattern:
ssh [your username]@[your domain name]
The system will ask you for your password, and after you enter it, you will be in.
NOTE: If your domain name is still not pointed to the hosting server, you can use the server’s IP.
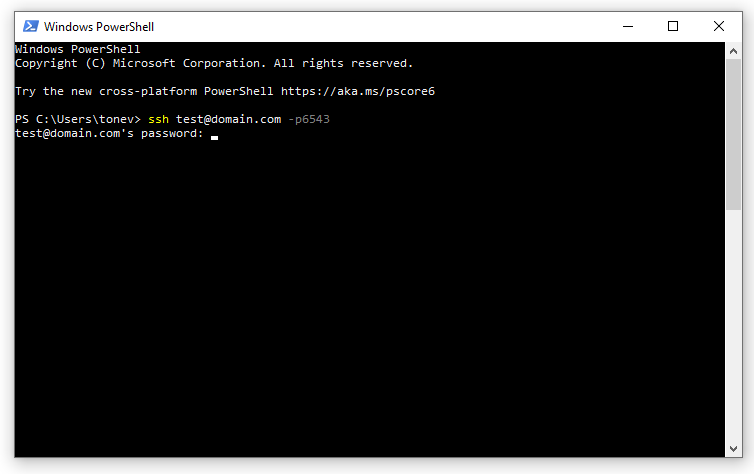
By default, SSH connections are established on port 22, but some hosting companies change it for additional security. If that’s the case, you’ll need to add -p[your host’s SSH port] to the login command. For example, at ScalaHosting, we’ve configured our managed VPS to use port 6543 for SSH connections, so when you’re logging in, you’ll see something like this:
When you successfully log in, you’ll want to check whether WP-CLI is installed.
Because it’s so popular, most hosting providers offer WP-CLI with their shared and managed plans, and information about it should be available on your host’s web pages.
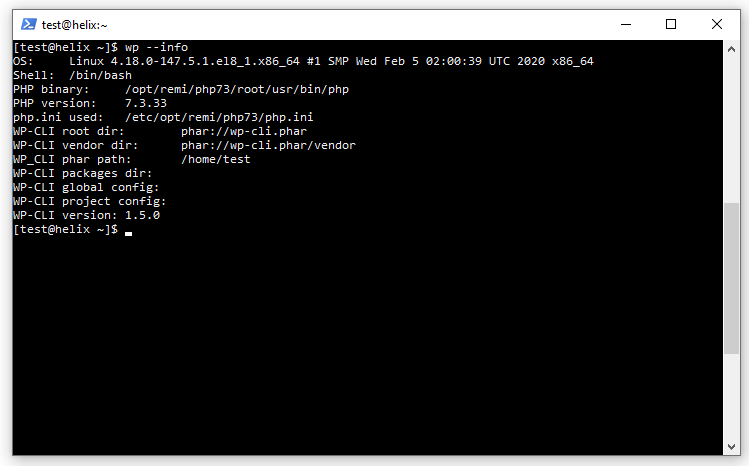
If you’re already logged in via SSH, you can check whether WP-CLI is installed with the following command:
wp –info
If WP-CLI is included in your hosting account, the output should look something like this:
If it isn’t available, you’ll need to set it up yourself, which sounds more daunting than it is.
First, you have to download the PHP archive file with the following command:
curl -O https://raw.githubusercontent.com/wp-cli/builds/gh-pages/phar/wp-cli.phar
Next, you’ll want to change the file’s permissions and make it executable:
chmod +x wp-cli.phar
Finally, to make sure you can use the PHAR file with the wp command, you need to move it to your server’s bin folder. The command is:
sudo mv wp-cli.phar /usr/local/bin/wp
As you can see from the command above, installing WP-CLI requires root access. If it’s not included in your hosting plan, you may need to ask your host’s support team for assistance.

What Can You Do With WP-CLI?
The list of things to do with WP-CLI is too long to fit in a single article. Thankfully, the official documentation is pretty detailed, and there’s no shortage of tutorials explaining how you can use WP-CLI to improve your workflow. The wp help command can also be helpful if you get stuck.
However, to give you an idea of how powerful WP-CLI is, we’ll now give you a short tour of some of the functions you’re most likely to explore.
Installing WordPress and managing your installation
You can use WP-CLI to set up a brand new WordPress installation on your account. Obviously, you first need to navigate to the directory where your site will be hosted (usually, the public_html folder).
Before you can do anything, you need to set up the website’s database and MySQL user. In some rare cases, you may need to do it via the console, though most hosts include GUI-based database management systems in their plans.
Here, for example, is the interface if you use one of ScalaHosting’s SPanel managed VPS:
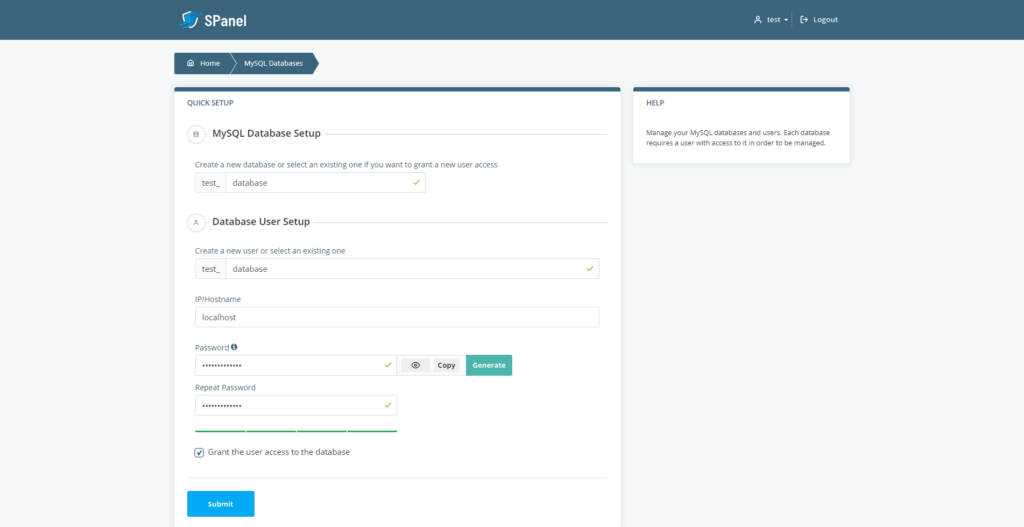
NOTE: Remember to take note of the login credentials you set for the MySQL user, as you’ll need them during the next step.
With the database set up, you need to download the WordPress core files. Use the following command:
wp core download
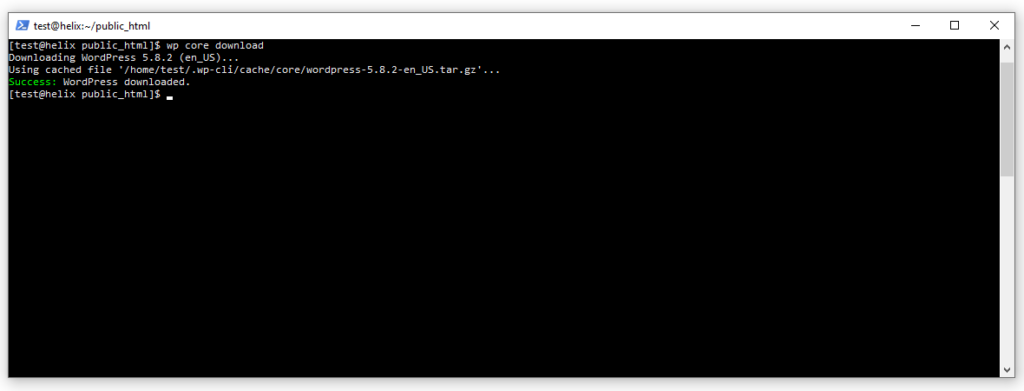
Now, it’s time to create the all-important wp-config.php file. The information contained in it guarantees that WordPress connects to the database and works correctly. You can theoretically set it up with a text editor, but doing it with WP-CLI is easier.
Here’s the command:
wp core config –dbhost=[the database host] –dbname=[the database’s name] –dbuser=[the MySQL user] –dbpass=[the database’s password]
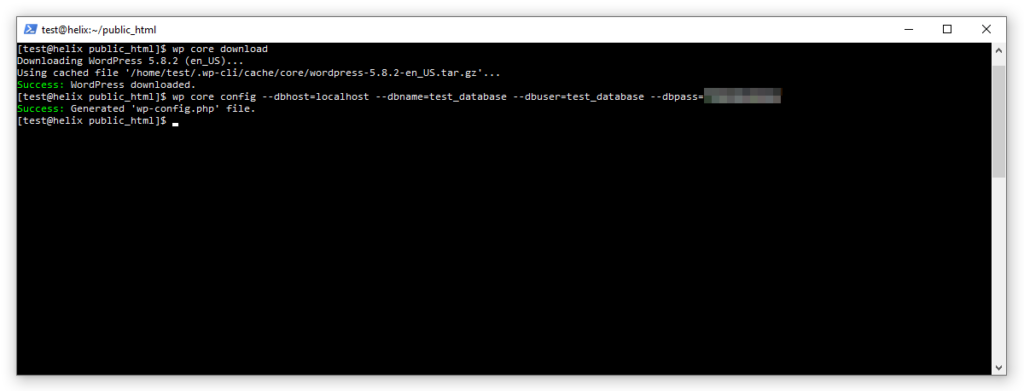
With the wp-config.php file ready, you can install the core itself. The command is as follows:
wp core install –url=[the site’s URL] –title=[the site’s title] –admin_name=[the username you’ll use to access the WP dashboard] –admin_password=[the password for the admin account] –admin_email=[the admin email address]
NOTE: If your site’s title consists of more than one word, you’ll need to put it in quotes.
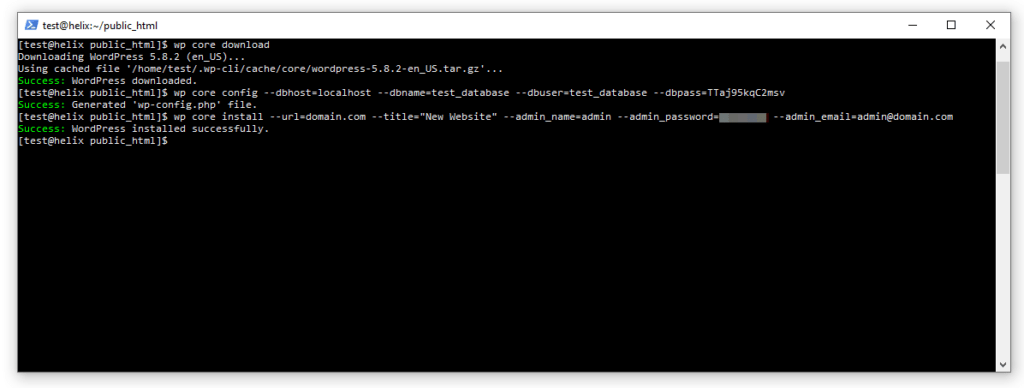
That’s it! WordPress is installed, and you can start working on your site.
Once it’s up and running, you can use WP-CLI to perform other tasks related to the WordPress core. Among other things, you can:
- Check for updates:
wp core check-update - Update the core:
wp core update - Launch WP’s database update procedure:
wp core update-db - Convert an existing installation into a multisite installation:
wp core multisite-convert - Set up a WP multisite installation from scratch:
wp core multisite-install
Creating and managing users
You can use WP-CLI to determine who has access to your site and dashboard. With the wp user list command, you will see a list of all the users currently registered on your website.
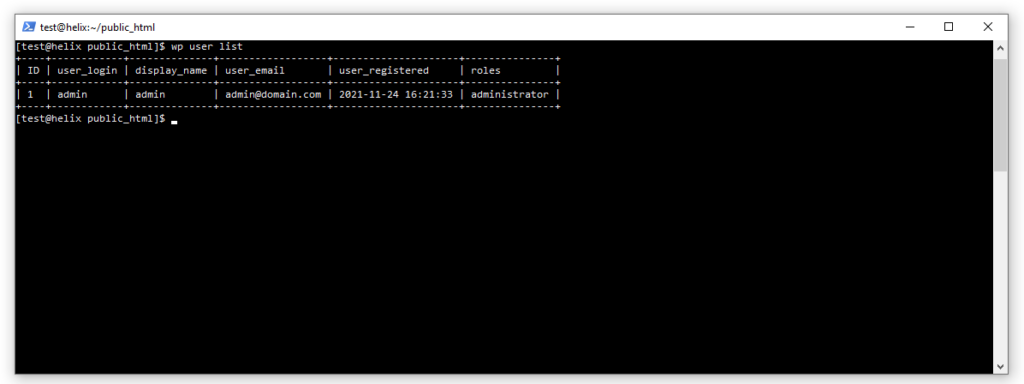
We can, of course, add new users to the list. Here, for example, is the command we’ll use to set up a user with the username “Alice” (we’ll assume her email address is “alice@domain.com”) and a role as an author.
wp user create Alice alice@domain.com –role=author
WP-CLI will automatically generate a password for Alice and display it on the screen.
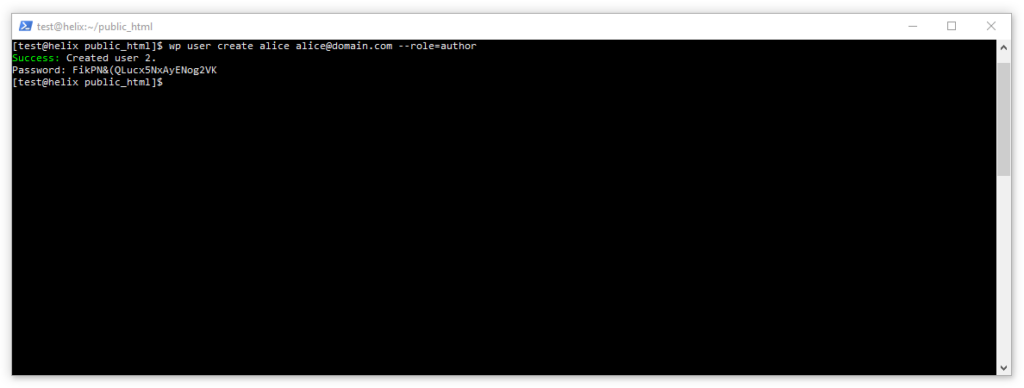
If you want to set the password yourself, you can use the –user_pass= parameter.
You can also use it if you need to assign a new password to one of your existing users. Here’s the command you’ll need to change Alice’s password:
wp user update Alice –user_pass=[the password you’ve chosen for the account]
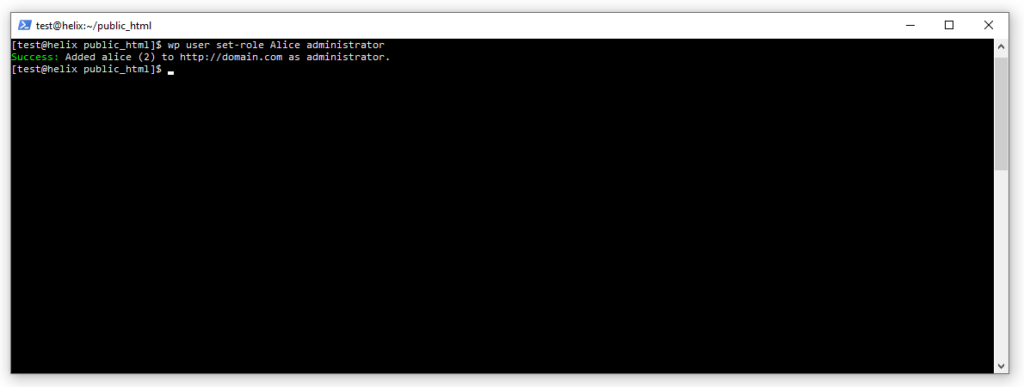
If you want to change Alice’s role to administrator, you’ll need a slightly different command:
wp user set-role Alice administrator
Installing and managing plugins
Plugins are a core part of every WordPress project, and managing them correctly is absolutely critical. With WP-CLI, you can install, activate, update, and delete plugins with easy-to-remember commands.
Because we have no GUI to work with, the wp plugin list command could be handy. It displays all the installed plugins along with their versions, status, and available updates.
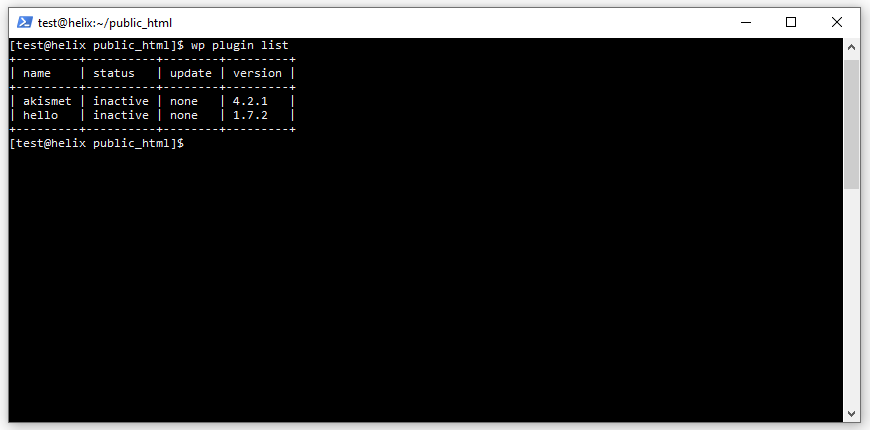
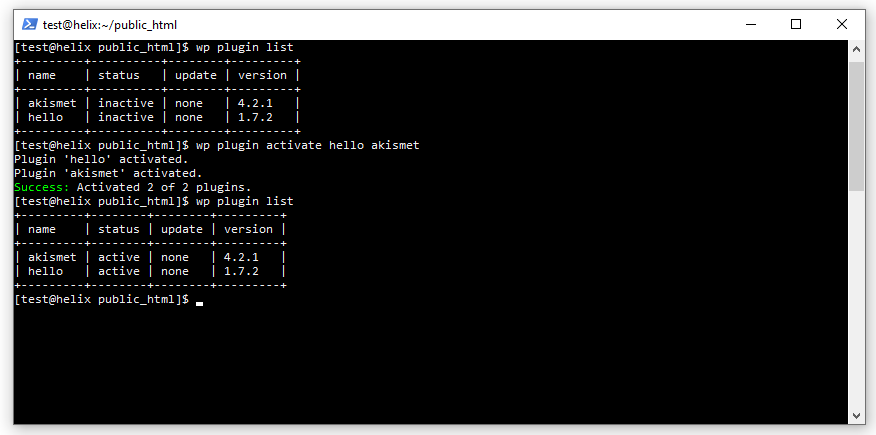
As you can see from the screenshot above, the Akismet and Hello Dolly plugins are installed but not activated. With WP-CLI, you can start using them both with the following command:
wp plugin activate hello akismet
You can also confirm that we have successfully activated them with the wp plugin list command.
To deactivate a plugin, use:
wp plugin deactivate [the plugin’s name]
Installing new plugins from WP’s official directory may seem like a bit more effort, but once you get the hang of it, you’ll see that there’s nothing too tricky about it.
To install a plugin, you’ll need its slug. Often, the slug is the plugin’s name, and if it consists of multiple words, they’re connected by dashes.
If you’re not sure what the plugin’s slug is, you can find it thanks to WP-CLI’s ability to search the official WordPress directory. Let’s search for “classic” and see what sort of results we’ll get:
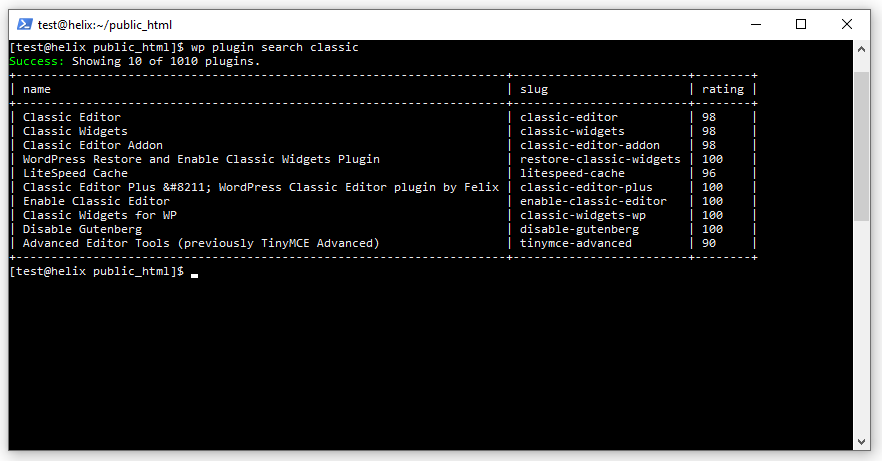
All the plugins that match our criteria appear alongside their slugs and ratings.
We’re now sure what the slug is, so we can install the Classic Editor plugin with the following command:
wp plugin install classic-editor
So far, so straightforward, but one of WP-CLI’s most convenient features is the ability to install multiple plugins at once.
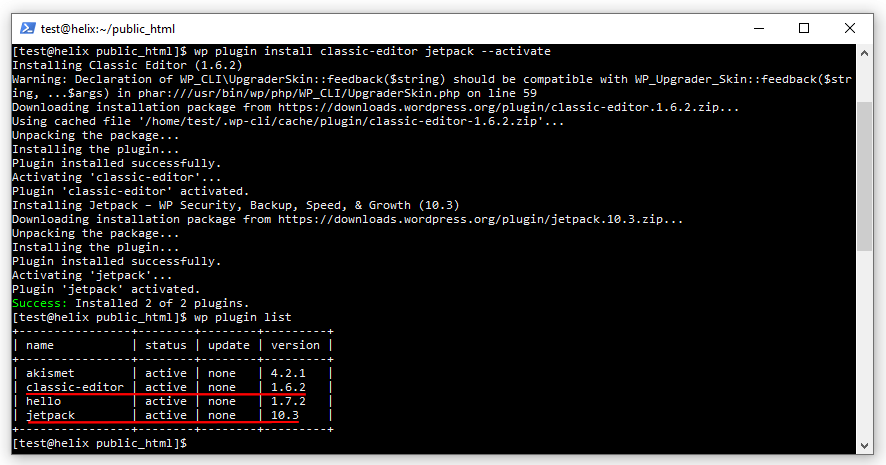
For example, if you want to install the Jetpack plugin alongside the Classic Editor, you can use:
wp plugin install classic-editor jetpack
Adding the –activate parameter will automatically enable them after the installation.
If you need to update a plugin, you can use the wp plugin update command followed by the plugin’s slug. The –all parameter updates all your plugins.
Using the same principle, you can use the wp plugin uninstall command to uninstall plugins. Bear in mind that this command will only work if the plugin is deactivated.
With the wp plugin delete command, you can delete plugins regardless of their status.
Installing and managing themes
If you get the hang of managing plugins via WP-CLI, you’ll have absolutely no problems taking care of your themes, as well. The principles are pretty much identical.
The wp theme list command tells you which themes you have installed and which one is currently active. Note that you can’t have more than one active theme at the same time.
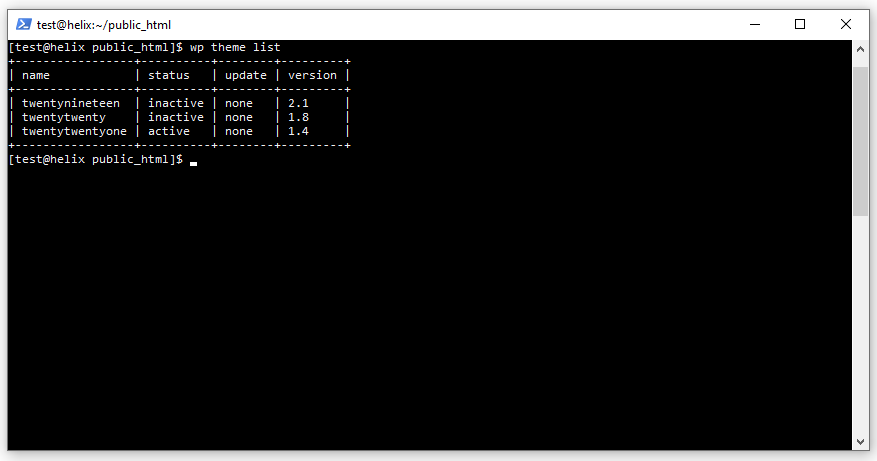
You can search through WP’s official directory with the wp theme search command, and just like you did with plugins, you’ll use a slug to install a theme with wp theme install.
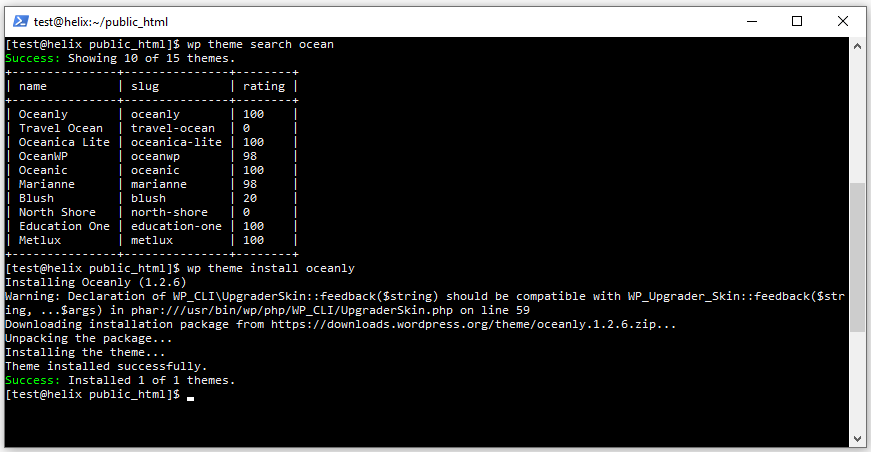
If this is the theme you want to use, the –activate parameter saves some time. Themes can be updated via wp theme update, and wp theme uninstall and wp theme delete are analogous to the commands for plugins discussed in the previous section.
Managing posts and comments
WP-CLI may not be the most convenient method for publishing, managing, and moderating posts and comments, but it pays to know that it exists as an option.
Once again, you have commands for listing all available posts and comments: wp post list and wp comment list, respectively. You also have a range of parameters you can use to filter the displayed results.
For example, if you add –post_status=draft, WP-CLI will list only the posts that have been saved as drafts, and if you add –comment_approved=0, the list you’ll see will consist of comments that haven’t been approved yet.
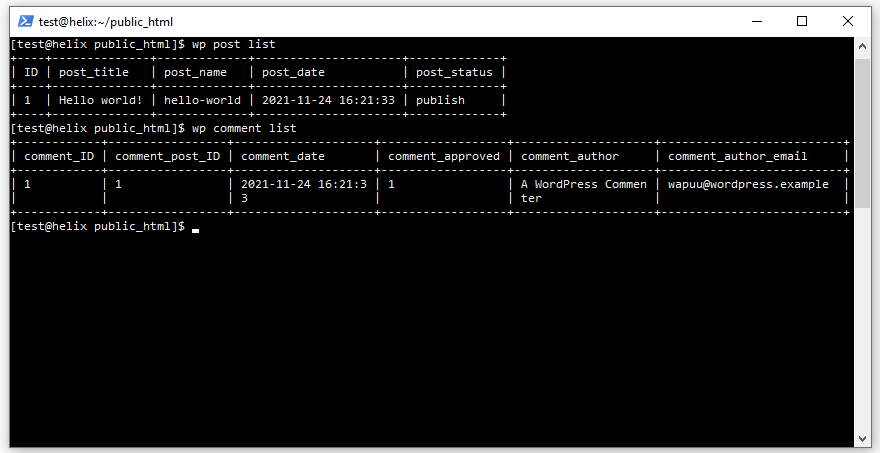
To edit comments and posts, you’ll use the wp post update and wp comment update commands. So, if you want to change the status of a post and save it as a draft, you’ll need wp post update followed by the post ID or name and –post_status=draft. Similarly, if you want to approve a comment, you enter wp comment update followed by the comment ID and –comment_approved=1.
You can create new posts with the wp post create command. You need to add the –post_title= parameter to set it up, and you have quite a few others to play with, including:
–post_author= followed by the user ID of the author
–post_content= for the content
–post_excerpt= for the short excerpt visible on the homepage
–post_type= to create a page (by default, the content is saved as a post)
–post_status= to publish the post immediately (by default, it’s saved as a draft)
The wp comment create command follows the same logic, with the most important parameters being:
–comment_post_ID= followed by the ID of the post under which you want the comment
–comment_content= followed by the contents of the comment
–comment_author= followed by the username of the comment’s author
NOTE: If the values you set on any of the parameters consist of more than one word, they need to be surrounded by quotes.
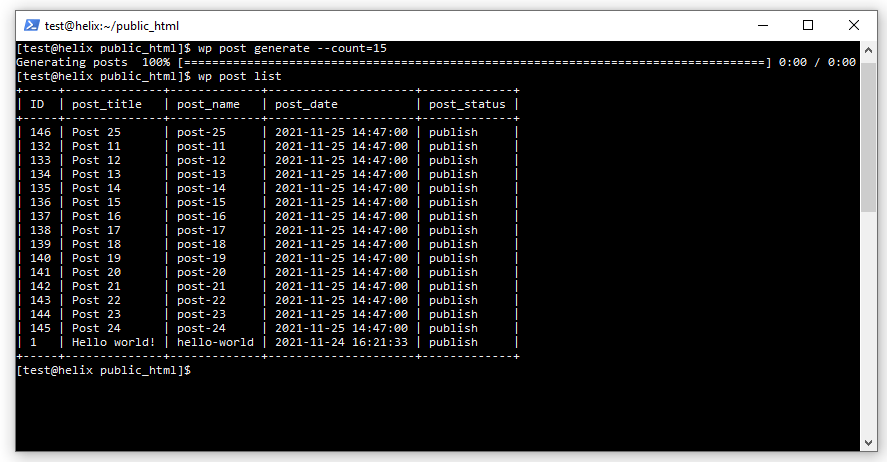
If you need to create a dummy site with some sample data to test something, you can use the wp post generate and wp comment generate commands to create posts and comments in bulk. The parameter that needs to follow is –count=, which determines the number of posts or comments you want to generate.
If you want to create 15 posts, for example, the command will look like this:
wp post generate –count=15
WP-CLI search/replace command
WordPress is a domain-dependent application. For example, if you use Joomla, you can access the application via the server’s IP even if your domain isn’t pointed correctly. With WordPress, you either need to point to the domain or edit your computer’s hosts file.
During installation, WordPress asks you for your site’s URL, which it enters into the database and later uses to build quite a few internal links. The more complex your website, the more internal links you have, and changing all of them could be a monumental task.
And every now and again, you might need to change them. For example, if you install an SSL certificate and need to switch your URLs to HTTPS, all the internal links have to be updated. The same is true if you change your domain.
WP-CLI has a quick and easy way of updating all database entries and setting a new site URL.
Remember that WP-CLI’s search/replace command edits entries in your database. If you don’t get it exactly right, you could break your website.
There is a –dry-run parameter which shows you exactly what sort of changes will be made, but it’s nevertheless a good idea to have a backup before you continue.
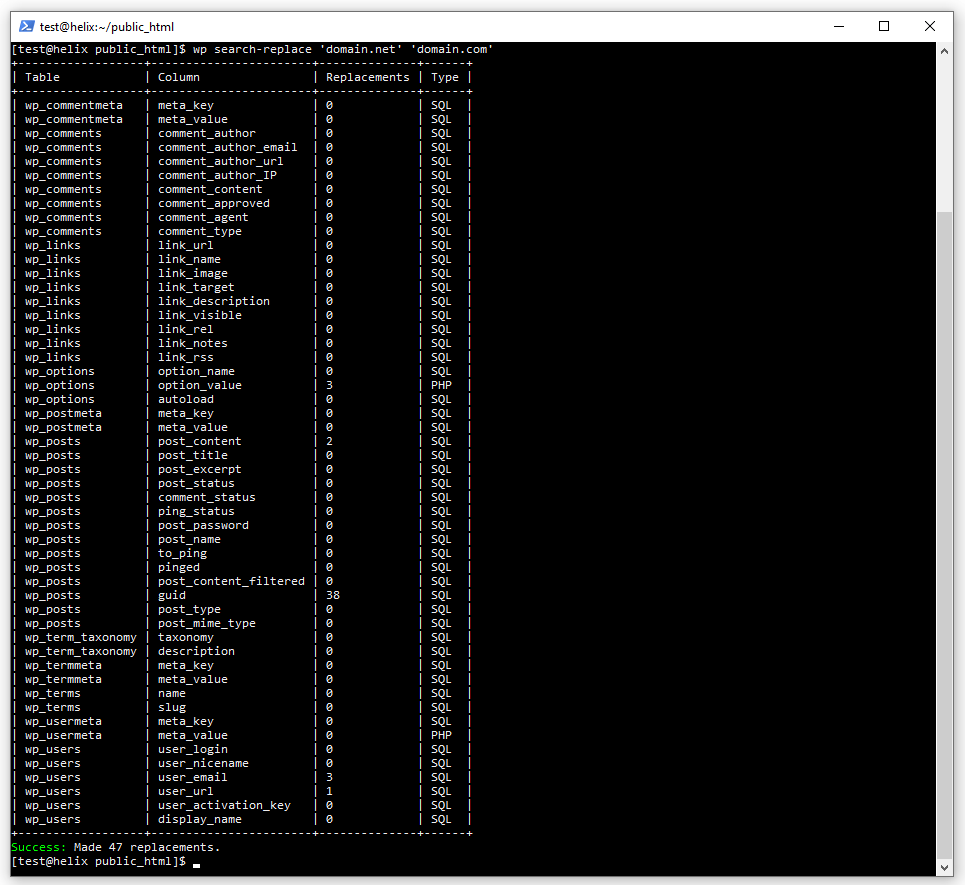
The command itself is pretty simple. Let’s say you want to change your domain from “domain.com” to “domain.net.” What you need to enter is:
wp search-replace ‘domain.com’ ‘domain.net’ –dry-run
Because of the –dry-run parameter, WP-CLI will display the tables and columns containing your old domain without making any changes to them. If you don’t see anything out of the ordinary, you can rerun the command without the –dry-run parameter. WP-CLI will make the necessary corrections and set the new site URL.
Plugins That Support WP-CLI
Plugin developers know just how popular WP-CLI is with experienced website administrators, so many of them have implemented support for the command-line interface into their products.
For example, if you use WooCommerce, the world’s most popular WP plugin for creating online shops, you can use WP-CLI to, among other things, add products in bulk and manage orders and clients.
The makers of Jetpack, a plugin for improving your website’s security and performance, also give you quite a few WP-CLI options. You can use commands to check Jetpack’s status, change its settings, whitelist IPs, disconnect users, etc.
If you find the command-line interface convenient, you could do worse than check your plugins and see if they too support WP-CLI. More often than not, information about this is available in the plugin’s documentation, and thankfully, it’s usually pretty detailed.

Conclusion
Even though we covered quite a few tasks that you can do with WP-CLI, we barely scratched the surface. The command-line interface is an incredibly powerful platform that plays an instrumental role in improving the workflow for many website administrators. You might find it a bit cumbersome at first, but getting used to working with it could save you a lot of time down the line, so be sure to give it a go.
FAQ
How do I use WP-CLI?
WP-CLI can be accessed remotely via SSH. If your local computer runs Windows, you can use PowerShell, and if your machine is based on macOS or Linux, you can connect to the server via the Terminal. Once you’re logged in, you need to navigate to the directory where your website is located before you can start executing WP-CLI commands.
Is WP-CLI safe?
SSH, the protocol you use to access WP-CLI, employs a robust encryption mechanism to ensure the information flowing between your personal computer and the host server is well protected. As long as your password is strong enough, you can be pretty sure your website is safe.
How do I download WordPress via the command line?
You can use WP-CLI to install WordPress on your account. To do that, use the wp core download command to download WP’s files to your server. Next, you need to use the wp config command to create the wp-config.php file, and finally, you can set up your site using wp core install.

