Just as any other store, your WooCommerce project cannot go without at least one active payment method so your customers would be able to pay for your goods.
Access the payment settings by clicking on the Payments tab.

Here, you are presented with a list of available payment methods.
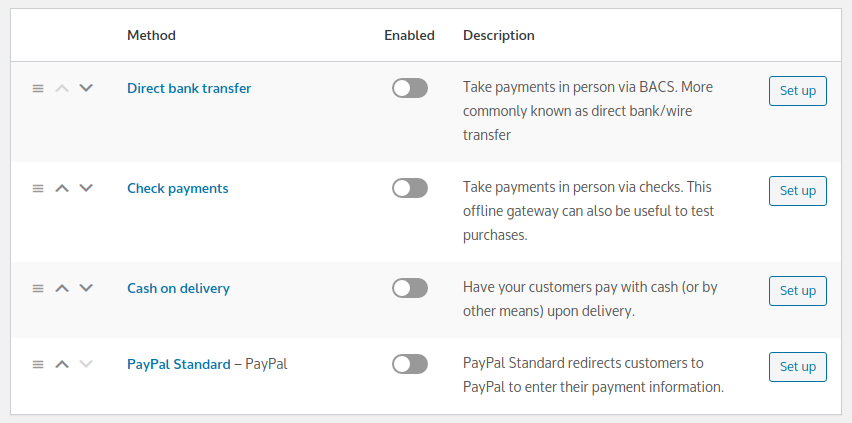
Let’s take note of the columns on the screen:
- Method
- Enabled
- Description
As you can see from the Enabled column, none of the payment methods are active.
Payment method settings can be grouped into 5 types:
1. Settings for priority
2. Active State (On/Off)
3. Payment Method settings
4. Payment Recipient settings
5. Payment Processor settings
Settings for priority change depending on the order payment methods are presented to your customers. Because of this, the table mirrors the list of payment options on the checkout page.
To edit the list, simply rearrange the payment methods in the table.
Tip: Move the most convenient payment method for your business to the top of the list.
Every payment method entry starts with a drag handle (3 horizontal lines), an upward-pointing arrow and a downward-pointing arrow.

Use the drag handle by holding the mouse button or click on the up/down arrows to move the payment across the list.
Make sure to confirm the rearranged order with the Save Changes button.

Active state defines whether a payment method is active or not. It can be either On or Off, toggled through the switch in the third column.
This setting does not require saving changes.

Setting up a Payment Method
You can access the Payment method settings by clicking the button at the end of the corresponding row.
Depending on the method’s Active State, that button may be labeled:
- Set up (if the method is Off)
- Manage (if the method is On)
Various WooCommerce plugins offer extra payment methods so you can attract a wider audience. If you decide to use one, make sure to pick an add-on that fits your region or business in particular.
Payment plugins vary wildly in terms of complexity and settings. Since every plugin comes with its own manual, this section intends to serve both as an example and an exercise for setting up a payment method.
Today, we’ll be setting up Direct Bank Transfer and PayPal Standard.
Setting up Direct Bank Transfer
1. Click the payment method’s Set up button.
2. Activate it by clicking the Enable/Disable checkbox, the first thing you’ll see on the page.
WooCommerce categorizes fields such as Title, Description, and Instructions as payment method settings. These are displayed to your customers during checkout. If needed, fill them out with any important bank transfer instructions you require.
Account details are categorized as payment recipient settings. Fill these out with the details you would need to give anyone who wants to send you a payment.

Make sure to click Save Changes once you are done filling out your payment details.
Setting up PayPal Standard
Click on the Payments tab to switch back to the payment processor list.

Locate PayPal Standard at the bottom of the list and click the Set Up button.
The page starts with the same settings we covered for Direct bank transfer.
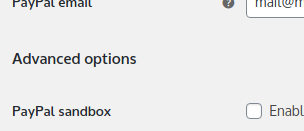
Next, we face the more advanced payment processor settings:
In this context, a payment processor is a service provider that your website uses to process debit cards, credit cards, and PayPal accounts. During checkout, the system redirects your customer to the service provider to fill out their payment details.
Once the payment goes through, the user is sent back to your store’s Thank You page.
During this entire process, your WooCommerce store collects additional technical information. For example, how the transaction went or what might have gone wrong.
Such information is then used to update the order status accordingly. Setting up this feature sometimes requires long, computer-generated passwords, known as keys. These can be obtained from the service provider.
Occasionally, as is the case with PayPal Standard, you can skip all the technicalities and do a basic setup:
1. Enter your PayPal Email in the corresponding field
2. Click on the Enable/Disable checkbox
3. Click the Save Changes button at the bottom of the page
That’s it – nothing more to it! It really doesn’t get easier than that.
Testing Payment Methods
Always test newly added or recently modified payment methods. It’s a good idea to submit orders through your store just as any customer would. To perform such tests, you can create a sample product with its Catalog Visibility set to Hidden, and its Price set to $0.01.
This way, you can test everything in a live environment and ensure everything works flawlessly. Once the payment goes through, simply cancel the order.
If the transaction fails, it’s recommended to consult a web developer. They can set up a test environment and troubleshoot the issue properly. If you feel adventurous and would like to go knee-deep into API keys and identity tokens — you can consult with the PayPal developer documentation.
