Before adding actual merchandise to your store, it’s best to remove any sample products first. Below are the types of content created across WooCommerce when creating or importing products:
- Product entries
- Product images
- Product categories
- Product tags
- Global and Custom product attributes
In WordPress, posts and other content can be associated with a specific user that you can delete, removing everything under it.
This is not the case with WooCommerce.
Here, products are not associated with the username they were published by, so related entries need to be removed by hand.
Tip: You can change the number of items you see on the Products, Categories, Attributes, or Tags screens. Click on Screen Options located at the top right corner of the screen and increase the value of Number of items per page, then click Apply.
Removing Product Entries
1. Click on Products at the main menu.
2. Select the top checkbox, located at the very first row of the products list.
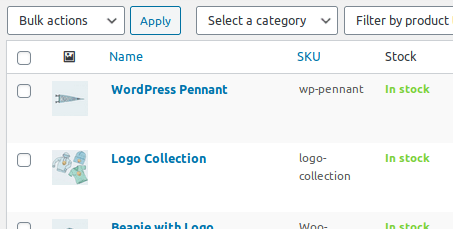
3. This will select the entire page of product entries. You can exclude products from deletion by unchecking the checkbox for their row.
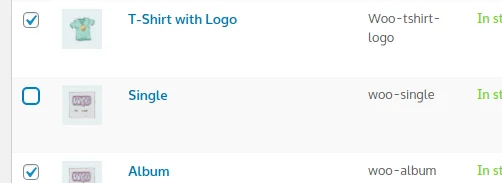
4. After refining your selection, use the Bulk Actions menu and select Move to Trash.

5. Confirm the action by clicking Apply.
6. This action results in the following events:
– Notification stating that 18 products are moved to trash appears, including an Undo button. Clicking it will reverse the action.
– A link to the Trash page appears, displaying a number of trashed items.
– The Product List is emptied and displays No Products Found.
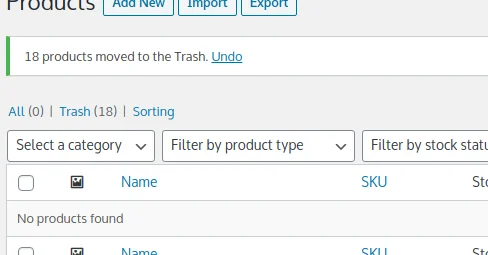
7. Click on the Trash(18) link to visit the Trash page.
8. The layout of the Trash screen is identical to the Products screen but performs different actions.
Pointing to a row from the Products list displays:
– Restore — to make them available on the Products screen again.
– Delete Permanently — to completely remove them.
– Duplicate — to restore a copy of the relevant product and start editing it.

Restore and Delete Permanently can be done selectively through the Bulk Actions menu. You can empty the entire list of Trash items by clicking Empty Trash. Clicking the Empty Trash button removes products immediately and does not require confirmation.
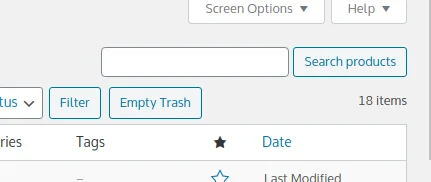
9. To complete this exercise, press Empty Trash. This will display the number of trashed items and will empty the products list.
How the Trash Works
When sending a product to the trash bin, the following happens:
- The item is hidden from the Products screen.
- The item is displayed on the Trash screen.
- The item remains hidden from the front end of your WooCommerce store.
- It continues to occupy its SEO-friendly URL, also known as Slug.
Example: You trash a product titled Velvet Pants with URL slug velvet-pants. The product is no longer part of your inventory. Creating a new product named Velvet Pants this time generates the slug velvet-pants-1 as the product in the Trash still uses the other URL.
- It continues to occupy the ID allocated upon creation.
- By default, products in the Trash remain there indefinitely.
The same Trash mechanics apply to other post types such as Posts and Pages. Items used for categorization, such as Categories, Tags,and Product Attributes do not have a Trash and cannot be restored after deletion.
Removing Product Categories and Tags
1. Click on Products → Categories; Products → Tags for tag items.
2. Remove all items from the screen using the Bulk Actions menu and the checkboxes for each row.
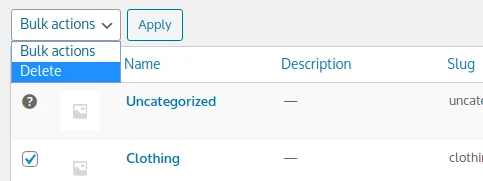
Note: Since categories are obligatory for WordPress and WooCommerce, Uncategorized is used as a placeholder for creating a product without a product category. Uncategorized cannot be deleted.
3. Clicking the Apply button deletes all custom entries and displays a confirmation text. Only products, posts, pages,and other post types support trashing.
4. If any list entries remain (besides Uncategorized), repeat steps 1–3.
Removing Product Attributes
Product attributes do not support bulk editing out of the box. This option is present only for the attribute values. On the Attributes screen, attribute values are referred to as Terms.
Once you click Configure Terms for a specific attribute, the Bulk Actions menu and the row checkboxes become available again. Of course, we have you covered with a plugin for bulk editing product attributes in the chapter: Essential WooCommerce Plugins.
Removing Attribute Terms (Optional)
Follow the steps in this section to see how you can remove attribute terms while preserving the product attribute.
1. Click on Product → Attributes.
2. In the Terms column, click on the Configure Terms link for the required attribute row.

3. The Edit Attribute screen features the typical WordPress item list. You can use the Bulk Actions menu and the checkboxes for removing all or specific entries.
Removing Product Attributes
1. Click on Product → Attributes.
2. Move the mouse over the desired row — the Edit and Delete links will appear.
Removing Product Images
1. Click on Media in the main menu.
2. By default, the Media Library screen displays items in a grid. Switch to List view to bring out the Bulk Actions menu and row checkboxes. Do this by clicking the List icon below the Media Library page title.

3. Once the Media Library is in List View, use the Bulk Actions menu and the checkbox on the first row to remove all entries.
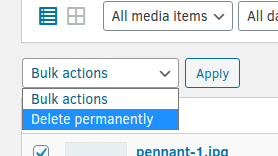
Note: Similar to Categories, Tags, and Attributes, Media Library entries are deleted permanently without requiring confirmation.
Tip: Click on Screen Options at the top right corner of the screen to increase the number of entries per page for more productivity.
