WHM (Web Host Manager) is a server management platform designed to eliminate many of the complexities of running a physical or virtual server.
It has a Graphical User Interface (GUI), meaning that you work with buttons and toggle switches instead of commands. WHM offers a comprehensive arsenal of tools, letting you deal with a whole heap of tasks quickly, efficiently, and with as little hassle as possible.
Today, we’ll look at some of the most important ones.
Introduction to WHM
WHM was launched way back in 1997, and over the years, it has become one of the most popular solutions of its kind. It works alongside the cPanel control panel and is developed by the same company.
The idea is to have two separate interfaces: one (WHM) for managing server-related settings and another (cPanel) for controlling individual projects.
Let’s take a quick rundown of some of the areas WHM controls:
- Hosting environment management – WHM can be used to configure things like the server’s hostname, IP address(es), and nameservers. You can manage web servers, database management systems, mail services, and dozens of additional software packages.
- Account management – Through WHM, you create and manage cPanel accounts. You can allocate resources to individual accounts, set limits and quotas, and monitor their usage at all times.
- DNS settings – Whenever you add a domain name to one of your cPanel accounts, you create the so-called DNS zone on your server. Through it, you can set several DNS records that control various aspects of how your domain resolves. All of them can be managed via WHM.
- Reseller hosting management – All settings related to cPanel reseller hosting, from account ownership through package management to branding and customization, are handled through WHM.
- Security – WHM offers a range of features aimed at improving server security aspects, including spam and brute-force protection, enforced encryption, access control, etc. WHM is also used to configure, create, and restore backups of both the entire server and individual accounts.
- Monitoring and analytics – WHM lets you check in on your server and see if all services that should be running on it are working fine. You get detailed information on the server load at any given time, and there are reports concerning user and account activity.
WHM and cPanel are browser-based, so you don’t need any additional software to manage your server with them. To access the WHM interface, simply enter your domain name or the server’s IP address followed by :2087 or /whm. By default, authentication happens through a username and a password.
WHM comes in two versions. If you’ve hired an entire physical or virtual server for yourself, you probably get the root WHM – the bells-and-whistles version equipped with every single server management feature produced by its developers.
If you’re a reseller, you get the non-root guise, which centers around account creation and management. You don’t have some of the tools related to the server’s core settings because your host is responsible for configuring them. However, you can still create and manage cPanel accounts, control various settings related to them, and monitor server load.
Now that we know what WHM is, it’s time to take a closer look at some of its key tools and features.
Account Creation and Management
A modern web hosting server is more than capable of handling multiple websites at once. However, there are several reasons why you want to keep individual projects isolated from each other.
Let’s have a look at them:
- Different website owners: Whether you’re a reseller or not, the individual projects on your server may be hosted by different individuals. You don’t want to see them getting in each other’s way, so it makes sense to isolate them in individual cPanel accounts.
- Different implementations of technologies: A separate cPanel account allows the website owner to customize their hosting environment to a certain extent. They can choose things like the PHP version and set specific directives for the web server.
- Easier management: Last but not least, keeping individual websites in their separate accounts makes things much more straightforward to organize. Even if you’re managing all the projects on your server alone, you’ll find it much easier to manage the files, databases, and settings if the individual projects are isolated.
Creating a new cPanel account
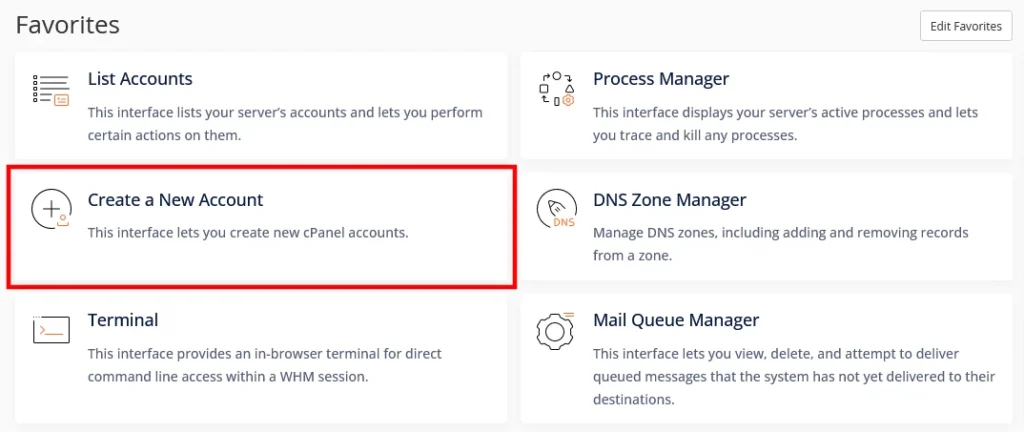
By default, WHM has a shortcut to the new cPanel account creation form on the homepage, under the Favorites section.
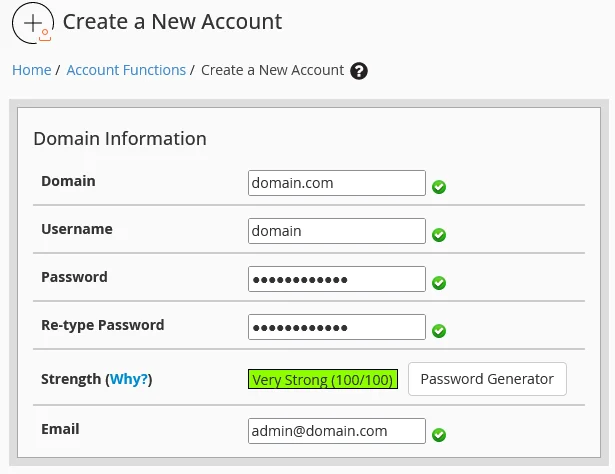
The interface is as straightforward as it could be. Your first job is to enter the cPanel account’s primary domain and choose its login credentials. The owner’s email address is also required, and for your convenience, there’s a password generator ensuring that the cPanel interface is properly protected.
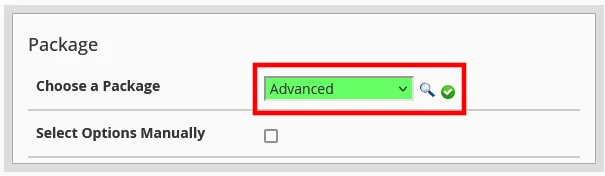
Below that, you have the Package section. With it, you set the quotas and limits for the new account. cPanel packages let you determine how much storage space and monthly bandwidth an account will have, as well as the maximum number of domains and subdomains, databases, email and FTP accounts, etc.
If you go back to WHM’s homepage, you can scroll down to the Packages section to edit your current packages or create a new one.

The preset packages are available in the drop-down on the account creation page.
Alternatively, you can click the Select Options Manually checkbox and configure the new account yourself. The limits could be individual for this project, but you can also save them as a package and apply them to future accounts.
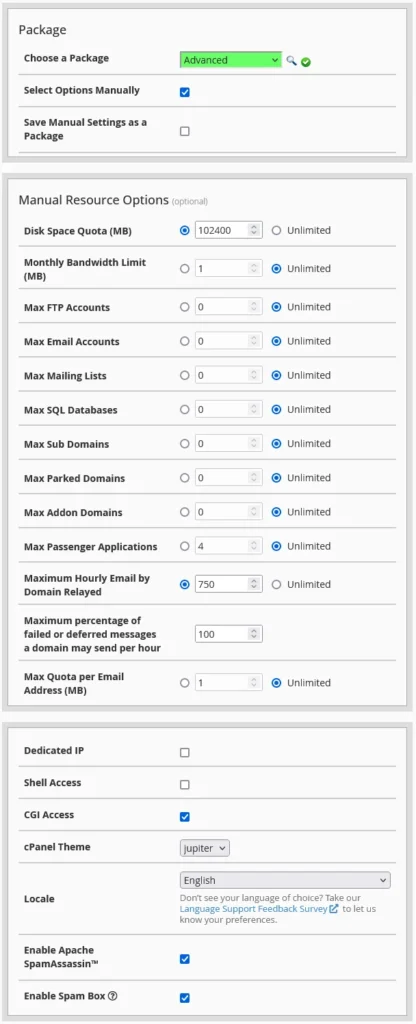
In addition to the quotas, a package can determine whether or not the account has a dedicated IP and SSH as well as CGI (Common Gateway Interface) access. You also choose the interface language, the cPanel theme, and the list of features the owner will have.
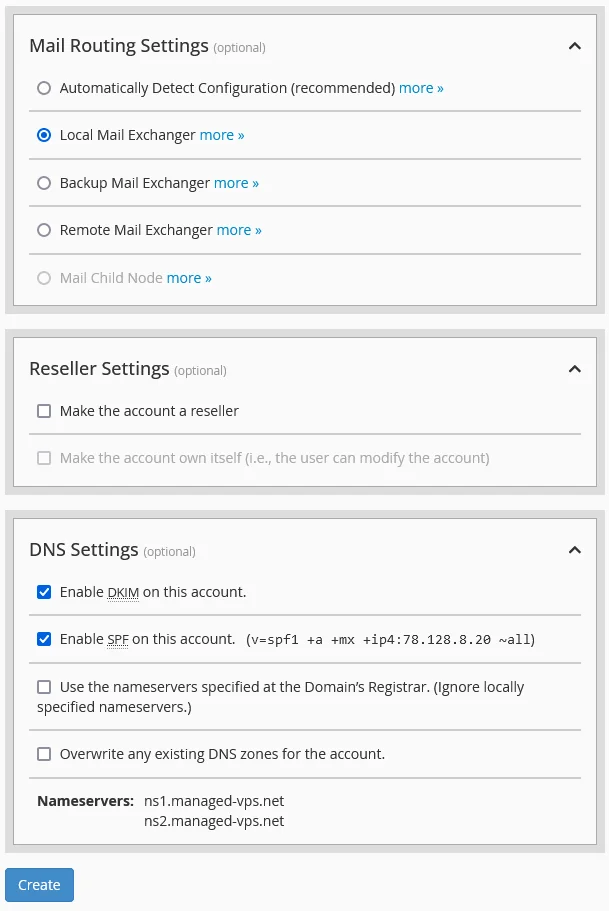
At the end of the account creation page, you have a few optional sections allowing you to set up the new account as a reseller, change its mail routing settings, and customize its DNS records. When you’re done, click Create to finish the process.
Managing cPanel accounts
All existing accounts are available in the List Accounts section, accessible from WHM’s homepage.
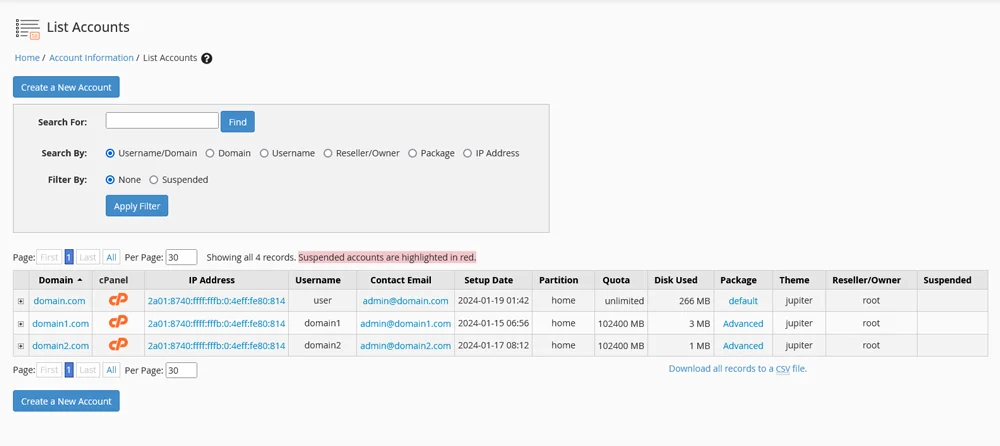
If you click the + button next to the primary domain on each account, you have quite a few modification options. You can change the contact email and the password, and there’s a Suspend button that should be pretty self-explanatory.
Next to it, you have a text box where you can enter the reason for the suspension, and if that WHM account has root privileges, there’s a Prevent unsuspending checkbox, which will stop regular users from reactivating the project.

Under Actions, you have:
- Change IP Address – The setting is applicable if you have dedicated IPs attached to your server.
- Change Disk Partition – This option may be useful if you have multiple storage devices.
- Change Quota – Through this button, you can increase or lower the storage space allocated to the account.
- Change Plan – You can use this to change the account’s package.
- Modify Account – The button allows you to alter anything from the primary domain name, through the username and contact information, to the resource limits and privileges.
- Terminate Account – Through this button, you permanently delete the account and all its data.
Creating a second WHM account
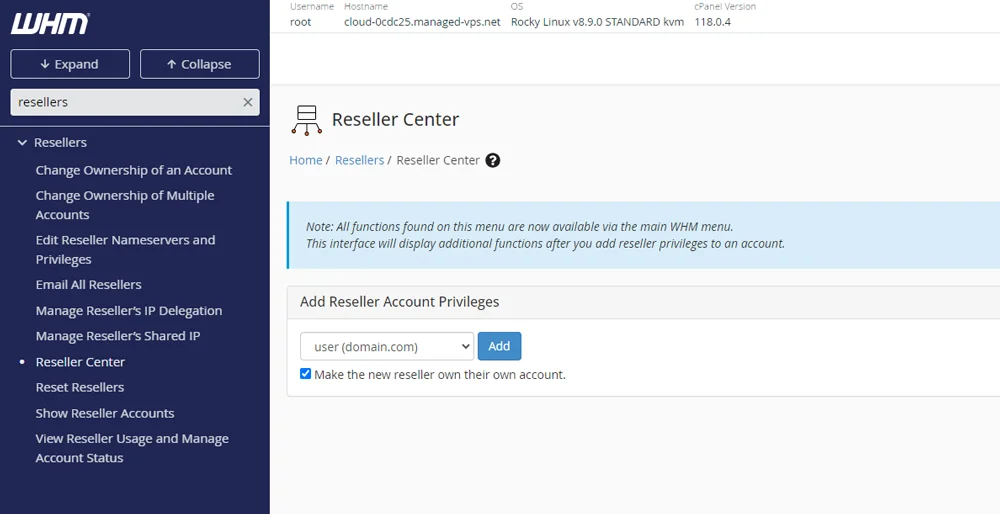
If you need to grant another person access to the WHM interface, you have to create a new account, turn it into a reseller, and edit its privileges. On WHM’s homepage, use the search functionality to search for “resellers” and click Reseller Center. Use the drop-down menu to choose one of your cPanel accounts and click Add.
Next, click Edit Reseller Nameservers and Privileges from the menu on the left. By default, the new reseller user is granted basic privileges limited mostly to checking information regarding specific services and managing non-critical configurations. Still, you can customize their access level according to your needs using the checkboxes available on this page.
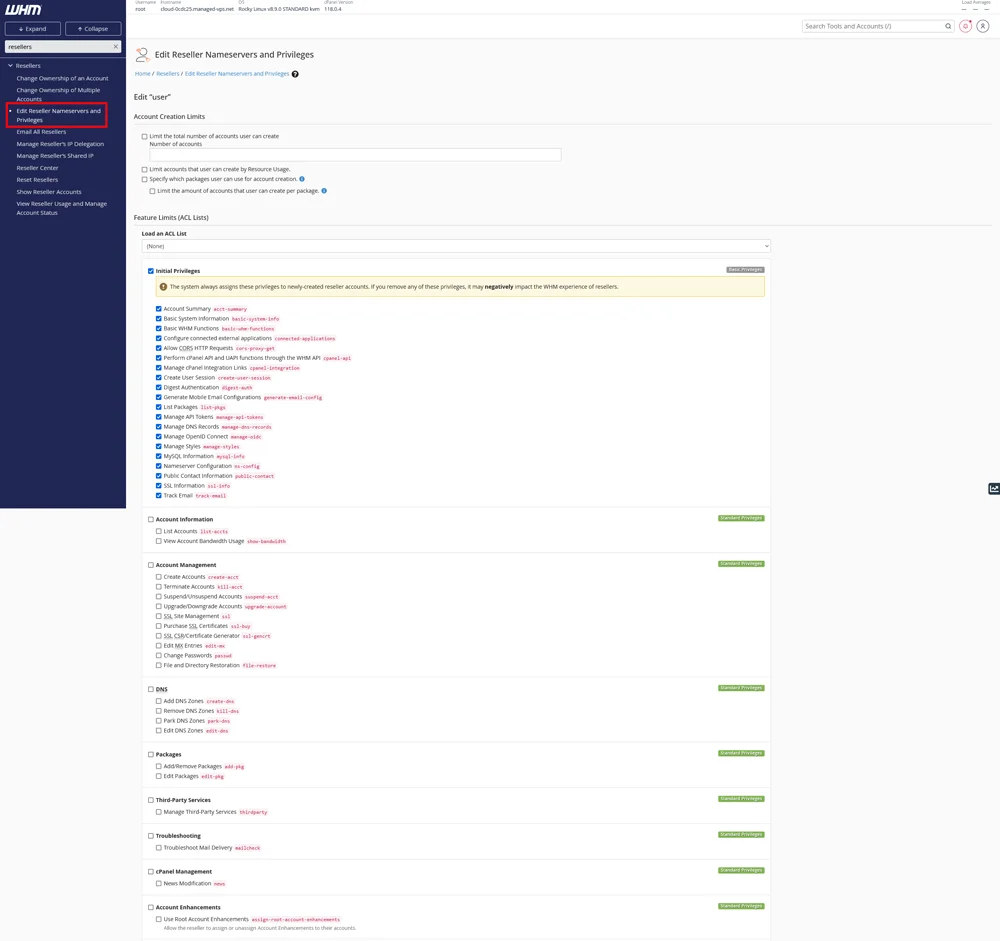
If you want to give the account full root privileges, scroll down to the Everything checkbox and select it.

Click Save All Changes to complete the process.
Server Management
If you own the server, your responsibilities go beyond creating and managing cPanel accounts. You must also configure the server and the software running on it. Normally, this would require a deep understanding of how Linux works, and you’d need to be fairly comfortable using Linux commands via the terminal. With WHM, you can manage the server by browsing menus, pressing buttons, and clicking toggle switches.
You can control anything from the machine’s hostname and primary nameservers through starting, stopping, and restarting critical services to configuring cron jobs to automate some tasks. The range of features allowing you to customize your server’s environment is far too long to detail in a single article, and the truth is, many of them are not really useful to the average server owner.
Nevertheless, some are worth looking at.
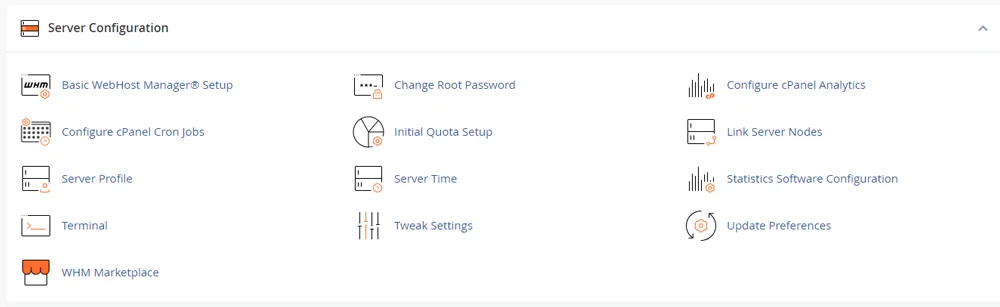
Let’s start with the basic ones. In the Server Configuration section on WHM’s homepage, you’ll find tools for changing the root password, updating contact information and default nameservers, and configuring how cPanel and WHM collect analytics data and statistics.
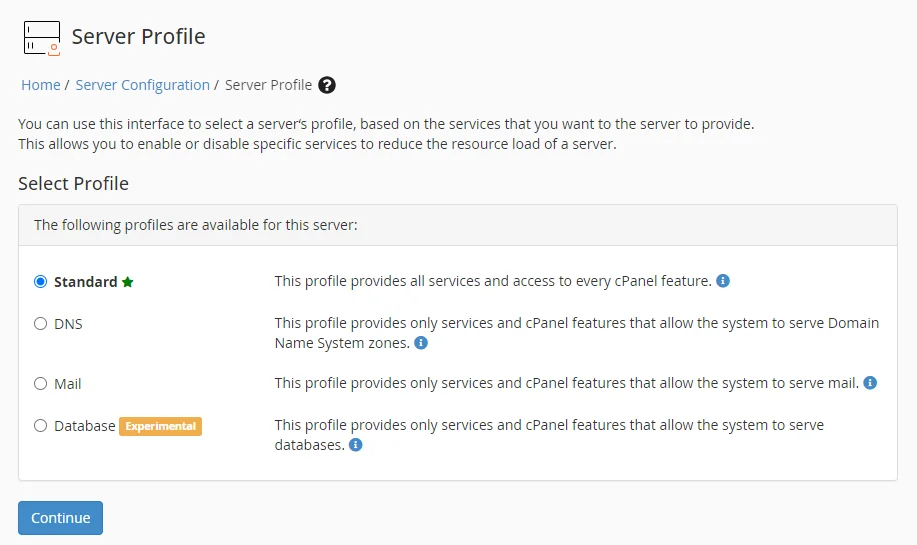
Through the Server Profile tool, you can decide what to use your server for and automatically optimize both the interface and the performance according to your needs.
In Standard form, all WHM tools and features are available. However, if you choose the DNS option, all services not related to the domain’s DNS zones will be disabled. The Mail setting leaves only the settings related to the sending and receiving of emails, and if you choose Database, you can use your machine as a database server.
If you go back to WHM’s homepage and scroll further down, you’ll get to the Contact Manager tool. Through it, you can configure your server to send notifications about specific events.
These may include anything from account creation to a user running out of storage space. They can be sent through a range of methods, including email and instant messaging applications like ICQ and Slack.
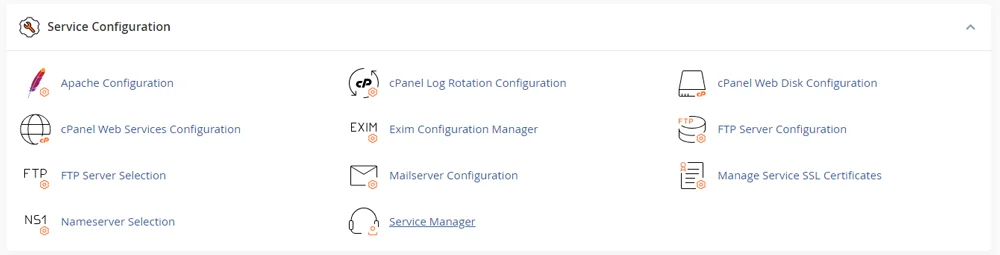
Further down, you have the Service Configuration section, where you have tools for changing the settings of critical components like Apache, your FTP server, the Exim mail server, the disk configuration, etc. Through the Service Manager, you enable and disable various services that run on your server.
Security Features
We’ve already discovered that a WHM-powered server is suitable for both resellers and individuals who work on their own projects. Both types of users need a server configured to protect the hosted data against a broad range of threats.
That’s why WHM is equipped with more than a few security tools and features to ensure you and your clients can trust the server. All you need to do is take advantage of them.
Let’s look at some of the utilities you should pay attention to.
Firewall configuration
The firewall is one of the most basic security features. It’s present on almost all web hosting servers, and its job is to filter traffic, control the networking ports used by software applications and services, and detect, prevent, and log activity related to potential server attacks.
One of the most popular firewall utilities for Linux servers is called ConfigServer Security & Firewall (CSF). It’s free and very likely comes preinstalled on your server.
Normally, setting up CSF to work to your strict specifications would require using the command line and editing the firewall’s configuration files. However, thanks to WHM, you can do it via a browser-based graphical interface.
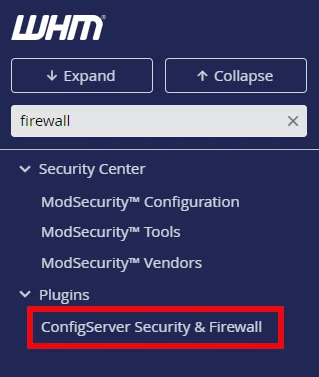
Login to WHM using an account with root privileges and enter “firewall” into the search utility on the left. Click ConfigServer Security & Firewall.
You’ll see data regarding the firewall’s current status, as well as a few buttons giving you access to various logs, statistics, and utilities.
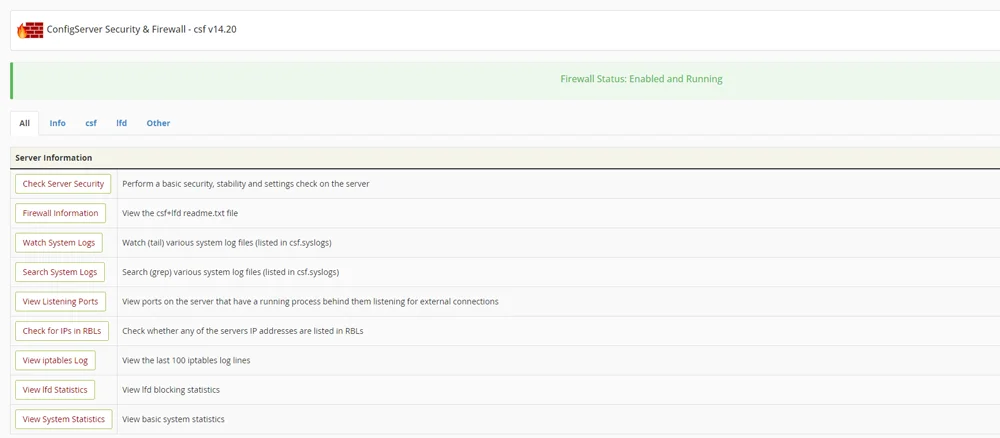
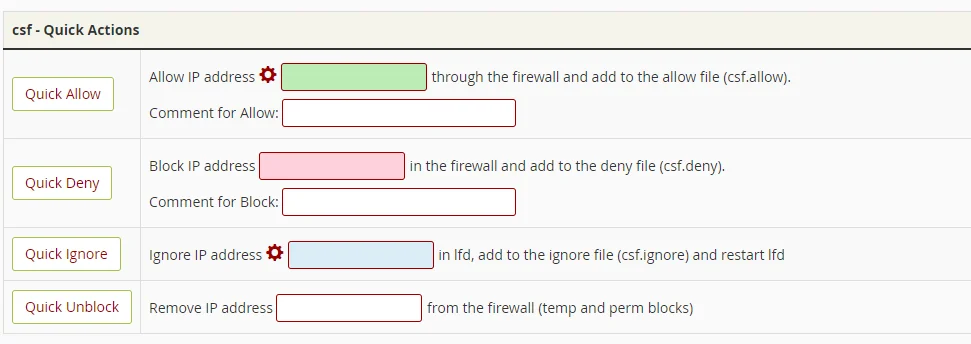
Further down, there are a few shortcut buttons that allow and deny access to specific IPs. They are a good option if you want to quickly implement custom rules related to your particular project.
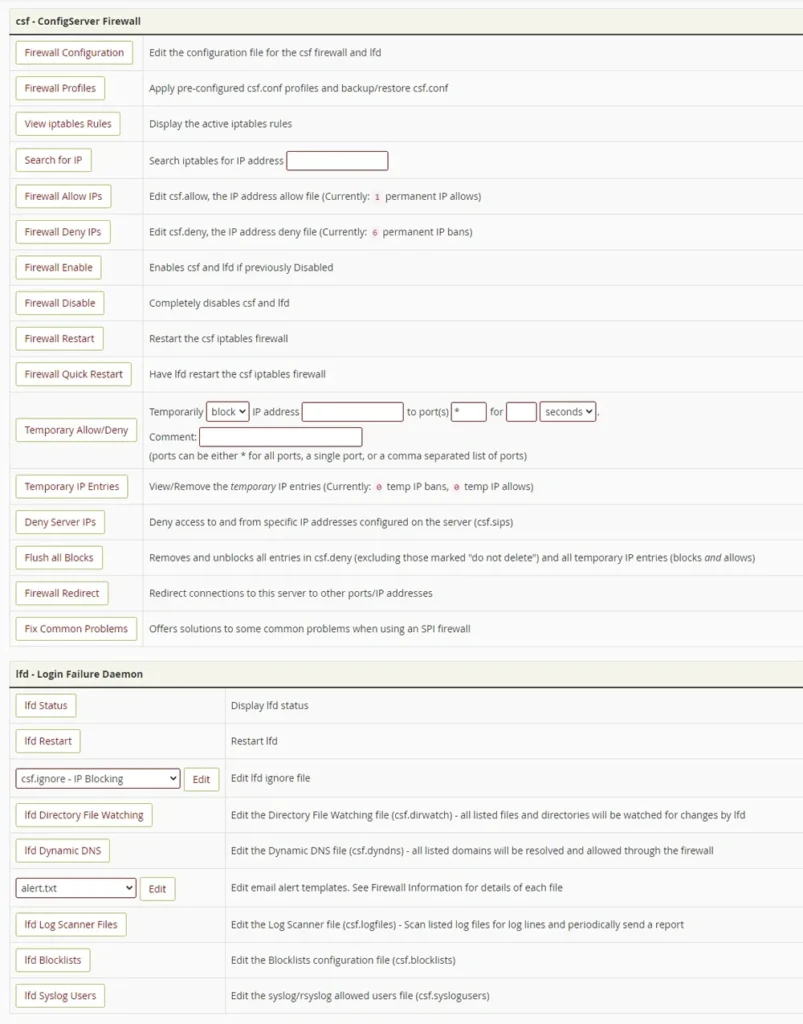
Below the shortcuts are the utilities configuring CSF and LFD (or Login Failure Daemon – a service designed to mitigate brute-force attacks).
SSL certificate management
SSL certificates are critical these days. Websites that aren’t served over an HTTPS connection pose a serious threat to users’ data, and given that you no longer need to pay to secure your websites, running them without SSL certificates makes no sense.
What WHM gives you is an intuitive interface to manage them.
Go to the homepage and scroll down to the SSL/TLS section to see all the tools you need to ensure the websites hosted on your server are served over a secure connection.
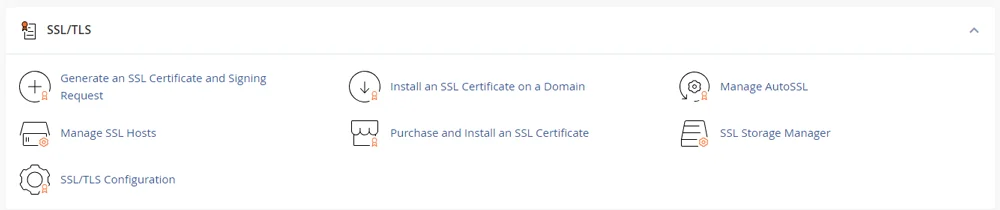
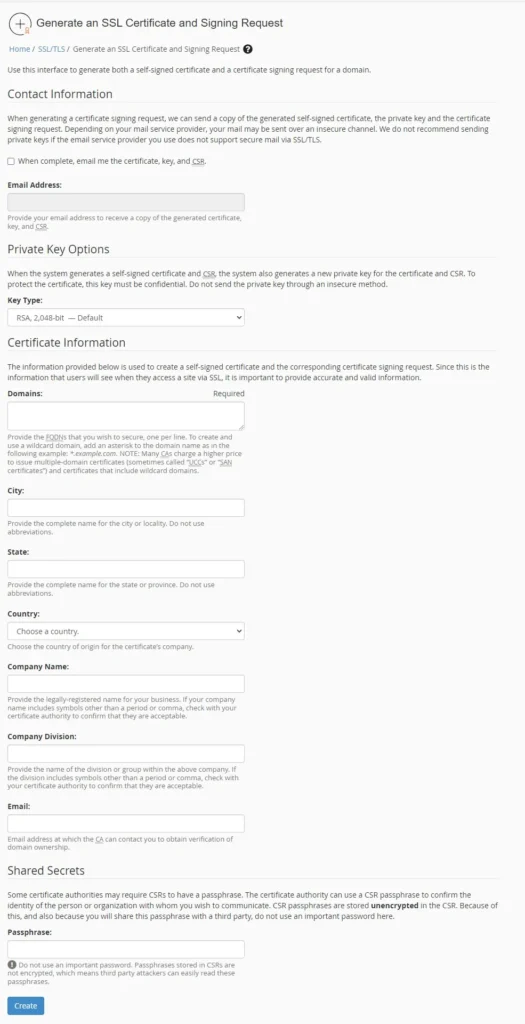
Through the SSL/TLS Configuration interface, you can choose the default type of SSL certificate. With that sorted, you can generate a certificate and a signing request (CSR) and then install it on one of the domains added to the server.
To generate a CSR, you need to enter your contact information, which is used to create a self-signed certificate. WHM will process the data and send it to the certificate authority, notifying you when the response is ready.
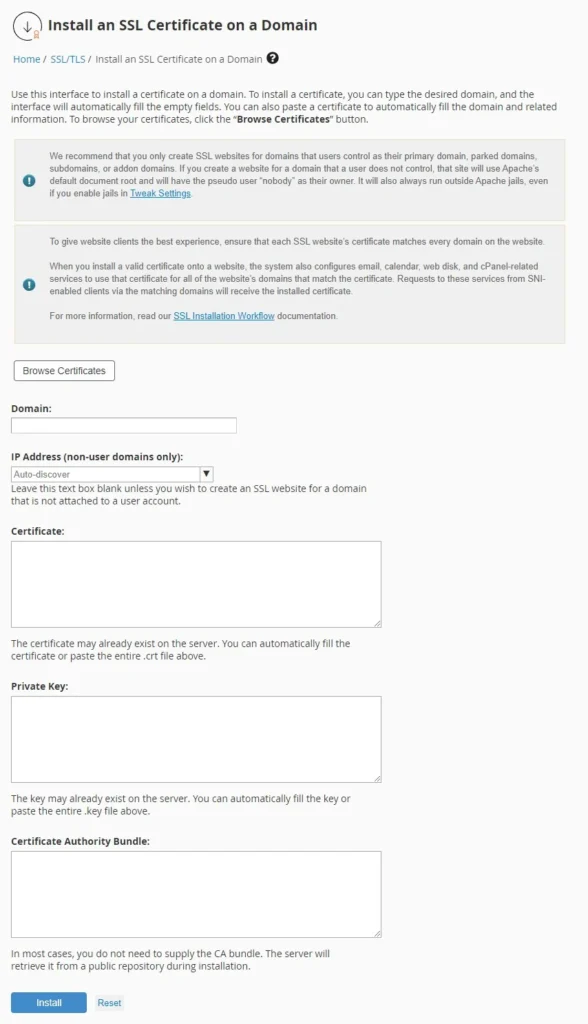
Once generated, the certificate can be installed via WHM. Click Install an SSL Certificate on a Domain on the management platform’s homepage, and enter your domain in its respective field. The tool will automatically generate and paste the certificate and the private key. Hit Install to complete the process.
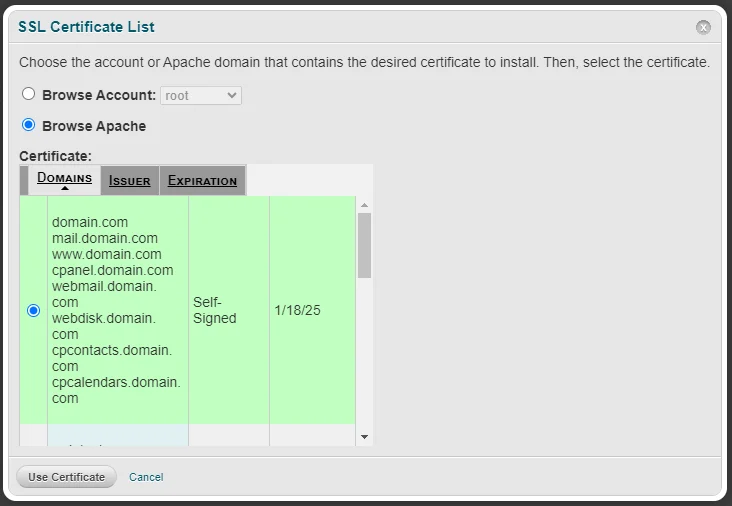
You should be able to see the SSL in the list that appears when you click Browse Certificates.
cPanel account security
The overall security of the server depends on how individual projects are protected. For example, even if you take all the necessary threat detection and prevention measures, the data on your server will still be at risk if cPanel account owners use “123456” as a password.
When setting up a new cPanel project, you have a password generator that lets you quickly create a strong password. The Password Strength Configuration tool settings in WHM are designed to ensure your login credentials meet the safety standards.
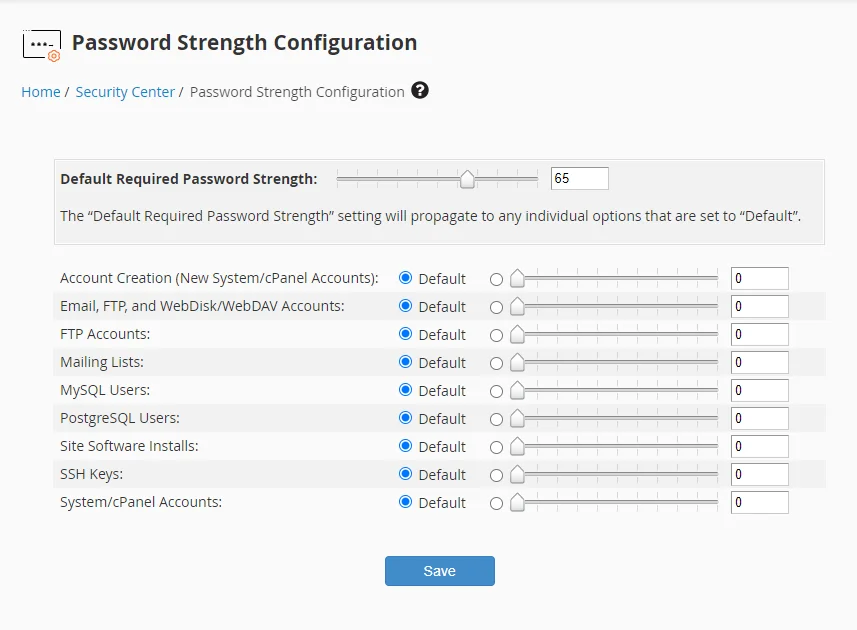
Through this interface, you can set minimum password strength requirements not only for cPanel accounts but also for FTP and database users, email inboxes, SSH keys, and even software installs. In other words, you can be sure that when someone installs WordPress, they won’t use admin/admin to access the backend.
Password strength is measured using a built-in meter that works in both WHM and cPanel. In the Web Host Manager, you can set a default password strength requirement and either use it for all accounts or configure individual rules for the different services.
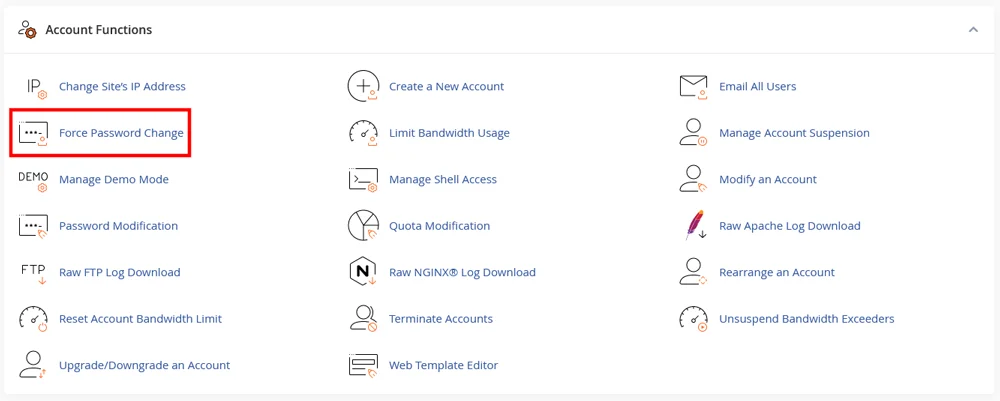
If you fear that one or more of the cPanel account owners on your server are using a weak password, you can easily force a password change through WHM. The tool is available under the Account Functions section on the management platform’s homepage, and it’s pretty straightforward to use.
Regardless of how strict they are, your password strength requirements won’t stop hackers from trying to break in. Fortunately, WHM is on hand once again to provide a solution.
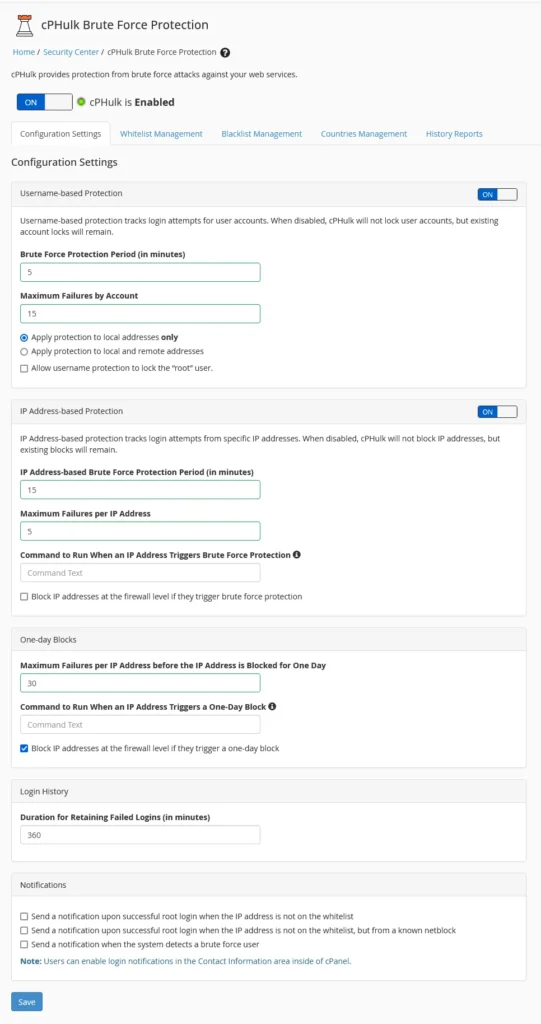
cPHulk is a brute-force protection system designed by the developers of WHM/cPanel. It protects the cPanel and WHM login forms as well as email, FTP, and SSH services. You can find its interface using the search functionality on WHM’s homepage, and after you enable it, you’ll see just how flexible and easy to configure it is.
You can limit failed login attempts based on targeted accounts and source IP addresses. You can allow or block IPs, ranges, and even entire countries, and you can determine how the system handles automatically blocked addresses and targets.
cPHulk also has a notification system that alerts you about any suspicious activity. Detailed information on failed login attempts is stored in reports.
To add another security layer, you can enable two-factor authentication (2FA) for both WHM and cPanel accounts.
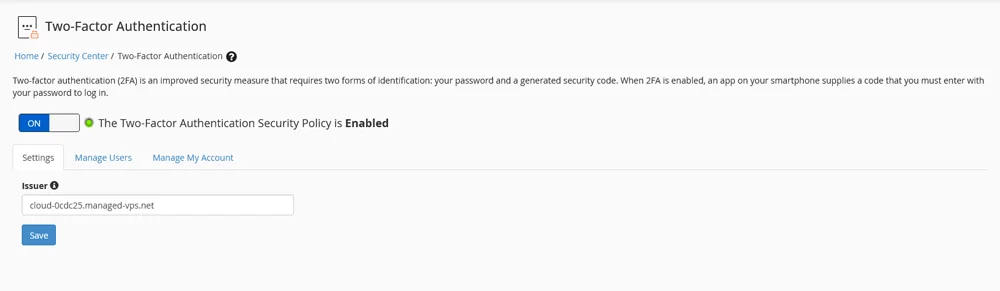
After you enable the 2FA policy in WHM, the option immediately becomes visible in the cPanel interface, and setting it up is as easy as scanning a QR code with a 2FA app like Google Authenticator and entering the code it generates.

Once configured, you’ll need to provide the temporary code your 2FA app generates in addition to your password whenever you want to log into your cPanel account. In WHM, you can disable 2FA for specific cPanel users.
To set up two-factor authentication on your WHM account, go to the Manage My Account tab. From then on, the steps are identical – scanning the QR code and entering the generated code.
Additional security tools and features
The Security Center section on WHM’s homepage offers quite a few other tools that can help you set up policies and enable various features to help you protect your server as best as possible. Some of them, like the security questions feature, are pretty straightforward to enable and use. Making the most of others requires a certain level of technical expertise.
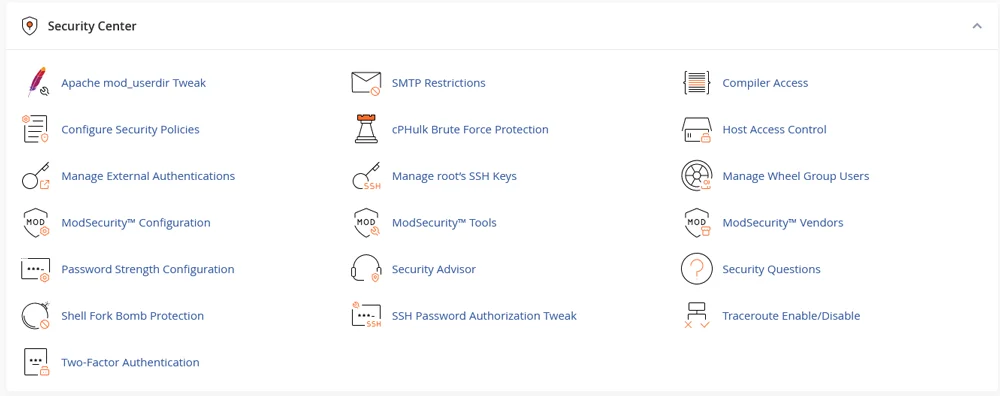
Nevertheless, doing some research and finding out how these tools can help you beef up your server’s defenses is a good call.
Backup Management
There are plenty of third-party tools that can help you reliably backup and restore your website. Chances are, however, that if you have WHM and cPanel installed on your server, you most likely won’t need them.
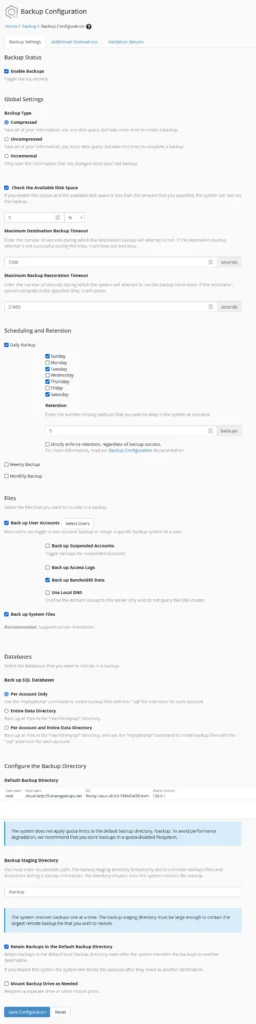
The server management platform comes with a comprehensive backup system that can automatically create copies of your files, databases, emails, logs, and everything else you might want to store. To set it up, log in to WHM and click Backup Configuration.
After you select the Enable Backups checkbox, you’ll see a range of options allowing you to specify how and when your server will back up data and what will be backed up exactly.
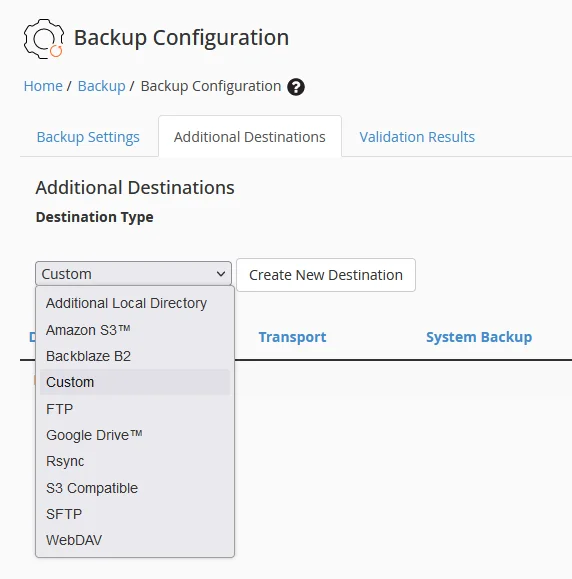
Go to the Additional Destinations tab, and you can configure WHM to send your backups to an offsite location. This is the safest option, as it ensures that a fire or another major incident at the data center housing your production server won’t affect your backups. You can use services like Google Drive or Amazon S3 or set up your own backup server and send the copies via FTP or rsync.
Email, Database, and DNS Tools
Managed hosting accounts come with all services related to building a website and sending and receiving emails ready to go. Nevertheless, WHM lets you customize your environment and set it up to your own specifications.
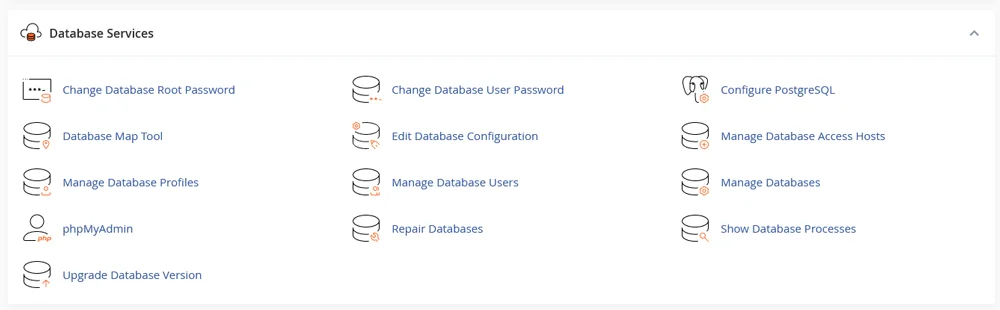
For example, while most hosting accounts support MySQL databases by default, WHM lets you use PostgreSQL as well. In the Database Services section on the platform’s homepage, you can also find a number of other tools that help you manage your databases and users.
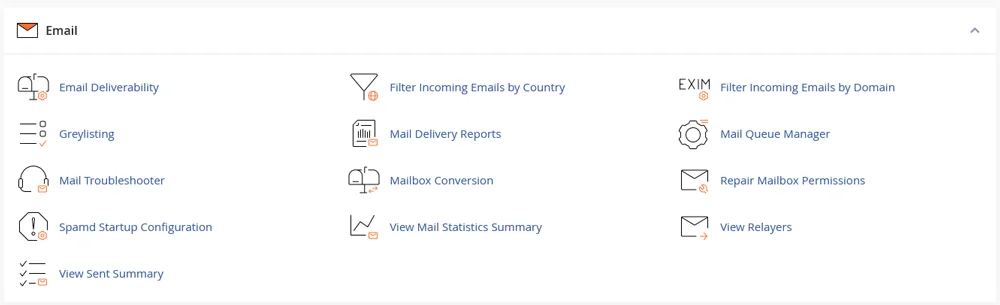
Email management is also much easier, thanks to the tools in the Email section. You can use them to set up various filters, monitor how users use their inboxes, and protect them from spam. There are also statistics and delivery reports, helping you ensure your users’ communication is reliable.
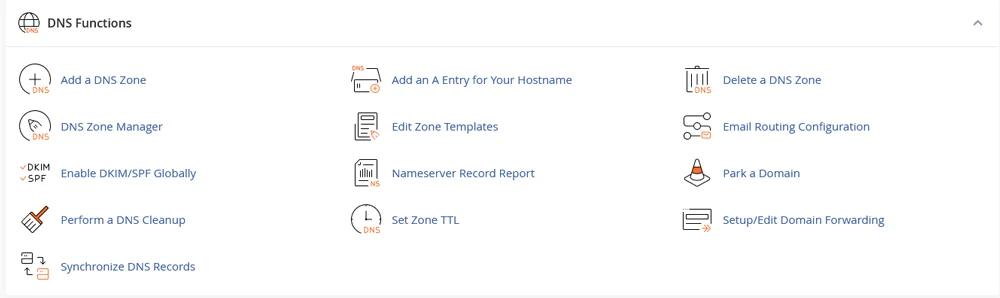
Often, pointing a domain to your hosting server is as easy as setting the correct nameservers. However, a lot more goes on behind the scenes, and you sometimes need to set records and tweak additional settings to ensure your website and emails work correctly.
In the DNS Functions section on WHM’s homepage, you have all the tools you need to configure these settings.
Hope you found our journey through the depths of the Web Host Manager useful. For more WHM questions, you can contact our Support Team and have our specialist find the best solution for you.