
ScalaHosting backs up your account every day and keeps a set of daily restore points you can roll back to.
This guide walks you through restoring both files and databases from those backups using the Restore Backups tool in cPanel – either over your existing data or into a separate location, so nothing gets overwritten by accident. All you need is access to your cPanel account; there’s no command line or support ticket involved.
Before You Start
- Access to your cPanel account
- At least one available restore point (brand-new accounts may not have a backup yet)
- An understanding that restoring over live data will replace any matching files or database – see the warning in each section below
Opening the Restore Backups Tool
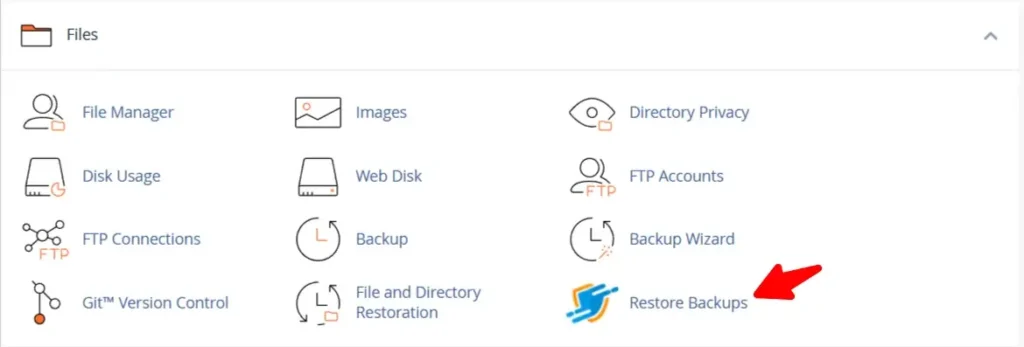
- Scroll to the Files section and click Restore Backups.
- Log in to your cPanel account.
On the left, under Available Dates, each daily restore point has a Show Files and a Show Databases link. The table across the top tracks any restore requests that are currently running.
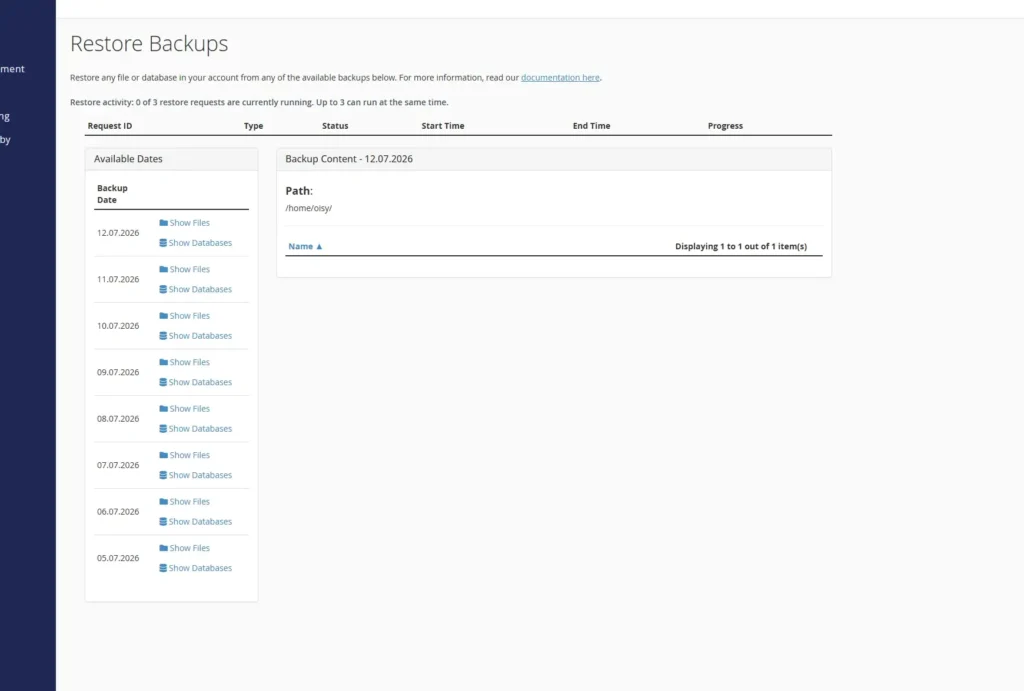
Note: Up to three restore requests can run at the same time. Each one gets a unique Request ID you can follow in the activity table at the top of the page.
Restoring Files
You can put files back exactly where they were, or drop them into a separate folder so you can review before replacing anything.
Restore Files to Their Original Location
- Click Restore.
- On the Restore Backups page, find the date you want and click Show Files.
- The page refreshes and shows the files and folders from that backup.
- Locate the file or folder you need and click Restore.
- In the dropdown, select Restore and overwrite existing files.
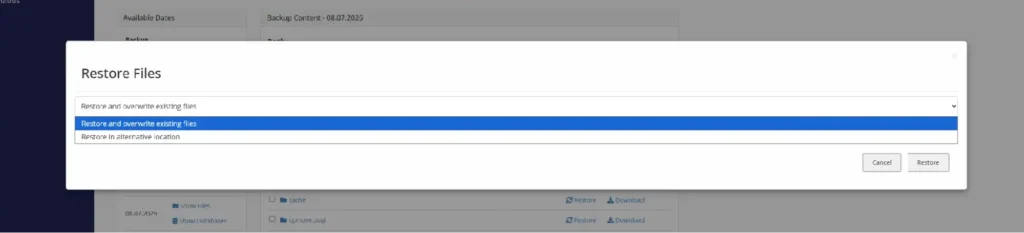
⚠ Warning: Restore and overwrite existing files replaces matching files in the target directory with the backed-up versions. If you’re not certain, restore to a separate location first (below) and copy what you need across by hand.
Restore Files to a Separate Location
- On the Restore Backups page, find the date and click Show Files.
- Locate the file or folder you need and click Restore.
- In the dropdown, select Restore in alternative location.
- In the text box that appears, enter the destination path – for example, /home/user/public_html_from_backup.
- Click Restore.
The files land in the folder you specified inside your account’s home directory, leaving your live files untouched.
Restoring Databases
Databases give you three options: overwrite the current one, save a .sql dump without importing, or download the dump to your computer.
Restore and Import Into Your Existing Database
- On the Restore Backups page, find the date and click Show Databases.
- The page refreshes and shows the databases from that backup.
- Locate the database you need and click Restore.
- In the dropdown, select Restore and import overwriting the existing database.
- Click Restore.
⚠ Warning: This replaces your current database with the backed-up copy, so any records added since the restore point will be lost. If you might need that newer data, save a .sql dump first (below) before you overwrite.
Restore as a .SQL File (SQL Dump)
- On the Restore Backups page, find the date and click Show Databases.
- Locate the database and click Restore.
- In the dropdown, select Copy the database SQL dump to /home/user/user_database.sql without importing.
- Click Restore.
When the process finishes, the .sql file for that date is waiting in your account’s home directory, ready to import whenever you choose.
Download a Database to Your Device
- On the Restore Backups page, find the date and click Show Databases.
- Locate the database and click Download.
- A new window opens so you can watch the .sql file being generated on the backup server. The download starts automatically in your browser once it’s ready.
Tracking a Restore
Every restore you start appears in the table at the top of the Restore Backups page, with its Request ID, Type, Status, start and end times, and a Progress indicator. A file or database restore is finished once its status shows complete. Larger databases take longer – if a request runs for more than 30 minutes without completing, contact our support team.

Restoring Backups in SPanel
If your account runs on SPanel, ScalaHosting’s own control panel, the process is much the same. Open the Restore Backup tool under the Files section, choose a restore point, and use its Show Files or Show Databases options to bring back exactly what you need.
Troubleshooting
Problem: The restore finished, but recent changes are missing.
Cause: The restore point predates those changes – each backup is a snapshot of a single day.
Solution: Choose a more recent date, or restore the earlier snapshot to a separate location and merge the newer data manually.
Problem: A restore has been running for a long time.
Cause: Large databases and big file sets take time to copy from the backup server, and only three requests run at once.
Solution: Wait for the queue to clear. If a single request exceeds 30 minutes, reach out to support.
