Of course, you need to be in front of your server before running commands.
You can connect to your server remotely, running commands over the internet through an encrypted channel using programs like Secure Shell (SSH) and Telnet.
But this article guides you on connecting to your remote computer via Telnet on your Mac computer, but first, let’s understand the protocol and how it works.
So let’s dive into it.
What’s Telnet?
Like SSH, Telnet allows people to connect to a remote computer over a TCP/IP network.
It lets users administer a server remotely through a Telnet server, manually return a result from a web server, or test or troubleshoot servers, including mail servers.
Telnet is less secure than SSH, it doesn’t use any form of encryption, but users can employ other methods to secure its communications.
How Telnet Works
Telnet utilizes a virtual terminal connection to provide users with a bidirectional text-oriented communication system.
Telnet client software lets users make connections to a telnet server (remote host). When connected, the client becomes a virtual terminal, allowing users to communicate with the remote server from their computers.
The client also lets users log in to the remote host as guest or public without setting up an account with the remote host.
Most operating systems come with in-built command-line telnet clients.
You could use these clients by opening your computer’s command line (like the Terminal app for Mac, DOS prompt for Windows, and the shell for Linux) and run this command –
telnet host port
And remember to replace ‘host’ with the service address and ‘port’ with the service’s port number.
Connecting to Telnet via Mac Terminal
You can connect to a server on its telnet port in two ways – let’s examine them.
Secure Connection Via SSH
As explained earlier, Telnet doesn’t offer any form of encryption, but you could telnet securely on your Mac computer by connecting via SSH.
To get started, go to Applications > Utilities > Terminal to open the Terminal app, then select New Remote Connection from the Shell menu.
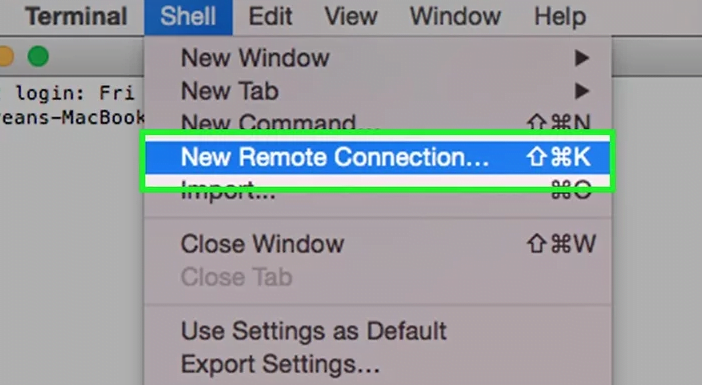
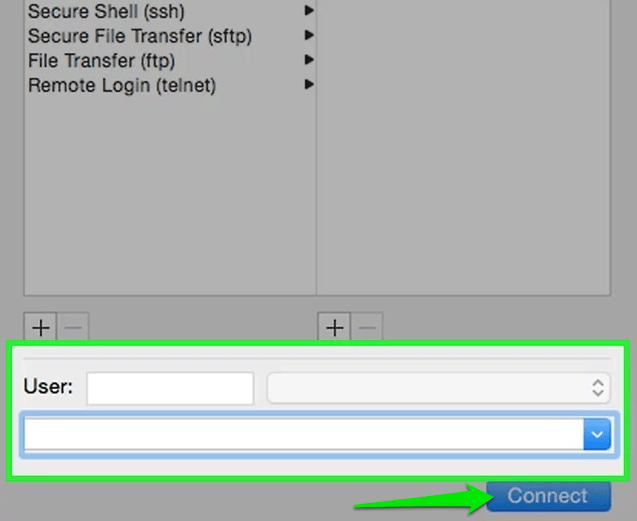
Enter a hostname or IP address in the last field of the New Connection window and click the Connect button.
Of course, don’t forget you’d need to have an account on the remote host before logging in.
Enter your password when prompted, and don’t fret when you don’t see your keystrokes—the system hides them for security purposes.
Now save your settings by clicking the + sign under the Server column.
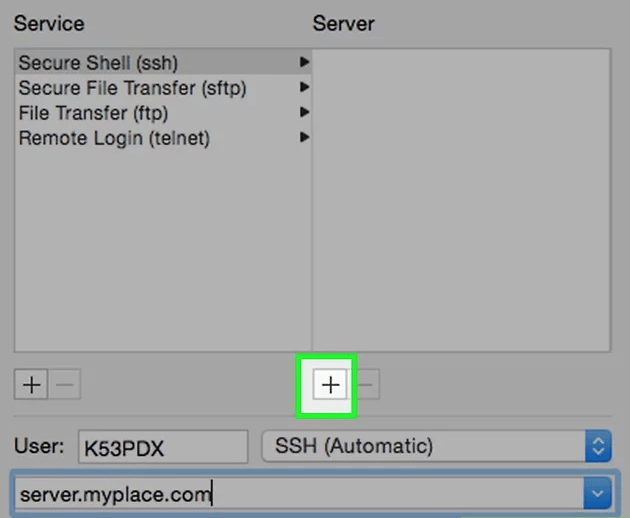
Input your server hostname or IP address and click OK.

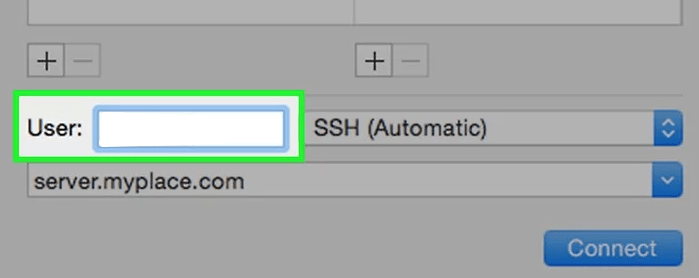
Please enter your user ID and click the Connect button to get it done.
Unsecure Connection
To connect to Telnet without SSH access on a Mac computer, go to Applications > Utilities > Terminal to open the Terminal app.
But do note that non-secure connections are susceptible to malicious interceptions.
However, to proceed with the connection, type telnet host port at the command prompt, replacing ‘host’ with the hostname, service address, or IP address, and ‘port’ with the appropriate port number.
Enter your connection password and username when prompted.
You could run telnet -help at the command prompt to get a list of the available parameters the command can receive.
Anytime you wish to exit the connection, hold the CTRL + ] keys, then type quit and press the Enter key on your keyboard.
Wrapping It Up
If a connection fails while trying to access some service, kindly contact the service provider for the correct service address or IP address and port.
But if you have questions relating to establishing telnet connections, reach out to our support, and we’ll be glad to assist you.