How to Install n8n – A Complete Guide
Improving efficiency is one of the most significant challenges businesses face today. Every single task can involve numerous applications and platforms, and workers often need to communicate with customers and colleagues, transferring vital business and personal information between various departments and digital storage devices. They have to do that quickly and securely.
n8n can completely transform the way you, as a business owner, approach these challenges. It’s an automation tool that can seamlessly connect hundreds of different apps and services. It helps with repetitive tasks, notifications, data synchronization, and it can be critical in integrating artificial intelligence into your workflows.
Thanks to all this, you can boost your business’s productivity, save a lot of time, and avoid costly mistakes. Furthermore, you can do that through a point-and-click interface that requires no technical or coding skills to master.
You can use n8n under the Software-as-a-Service model. The service is called n8n Cloud, and it’s provided by the developers of the automation tool. In simple terms, they set up an n8n instance on their servers, which you can use in exchange for a monthly fee.
However, n8n is a fully open-source platform. You’re free to download and use it without paying any licensing fees. You can also install n8n on a server of your choice.
Our job today is to show you how.
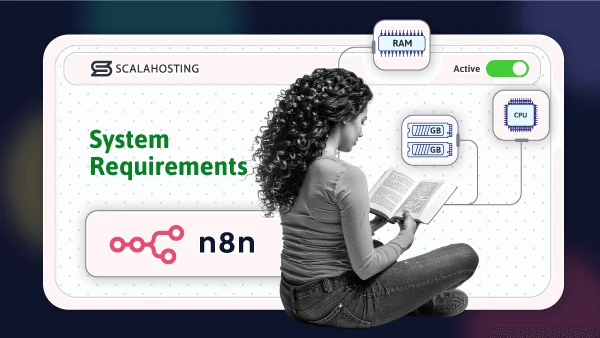
Prerequisites for Installing n8n

n8n isn’t a particularly resource-intensive application out of the box. In fact, the minimum system requirements look pretty low:
- CPU: n8n doesn’t use a lot of processing power. A small, self-hosted n8n instance should run smoothly on a server with 2 CPU cores.
- RAM: A simple n8n instance should work with as little as 2GB of operating memory.
- Storage: The storage requirements depend on the type of business you have and the volume of data n8n will need to process. However, for most projects, starting with around 20GB of storage should be sufficient.
- Operating system: n8n can run on any platform that supports Node.js, so the major operating systems (Windows, macOS, and Linux) are covered.
- Database: Out of the box, n8n uses SQLite, but for a more robust setup, you’d probably prefer a system running PostgreSQL.
- Node.js: To use n8n’s latest versions, you need to have Node.js version 20.19 or higher.
Because it’s open-source and the system requirements are so low, you can even install n8n on your personal device. It could be a laptop, a desktop computer, or even a Raspberry Pi. However, a local installation is only suitable for testing purposes or simple workflows with limited automation. If you plan to use n8n in a production environment, it is recommended to deploy it on a remote server.
The ideal service of choice for n8n should be a cloud-based VPS. On the one hand, it enables you to begin working on your new workflows in a reliable and affordable hosting environment. On the other hand, it’s scalable enough to provide you with all the upgrade options you need once you start integrating apps and setting up more complex automations.
ScalaHosting offers a range of cloud VPS solutions that can serve as the platform for your automation system, helping you streamline everyday business operations.
But how do you get started?
Method 1: One-Click n8n Install via SPanel (Recommended)
Often, installing new software on a VPS is done via the command line, which requires some basic technical skills. When it comes to setting up n8n on an SPanel server, however, this is not the case.
At ScalaHosting, we’ve seen the impact of n8n on some of our clients’ businesses, and we understand its value in optimizing everyday work. That’s why we’ve ensured SPanel provides the easiest possible way to set up n8n on your server.
The entire process involves a few mouse clicks and will take no more than 10 minutes. Here are the steps:
Step 1: Log in to the SPanel’s User Interface
By default, SPanel’s login page is located at https://[your server’s IP]/spanel. You can use your user account’s login credentials to access the User Interface directly. Alternatively, you can open the Admin Interface first and then click Manage next to the account you want to use for your n8n installation.

Step 2: Navigate to the NodeJS Manager
SPanel’s NodeJS Manager is a utility allowing you to deploy and manage as many Node.js applications as you want through a convenient graphical user interface. It’s available under the Software section in the User Interface.

Step 3: Click Deploy a New App and select n8n Automation
NodeJS Manager’s homepage features a Deploy a New App button. The interface is extremely straightforward, especially if you’re setting up n8n.
At the top of the page, you can select between a custom application or n8n. In our case, the n8n Automation is the option you have to pick.
The only thing you need to do is specify the URL you’ll use for accessing n8n. Your best option is to use a subdomain that you can create through the Subdomains section on the SPanel User Interface homepage. However, you can also deploy n8n in a subfolder.

Step 4: Click Deploy and wait for the installation to complete
After you’ve specified the URL, you can click the Deploy button. SPanel will start the installation automatically in the background.
Depending on the server load and hardware configuration, the process can take up to ten minutes. When it’s done, you’ll see a notification at the top of the screen.

You can see the entire process in the handy instruction video below.
How to Install and Self Host n8n with SPanel
Step 5: Access your new n8n application and create a new admin account
You can now visit the application URL and create a new admin account.

The process is about as straightforward as it gets – you have to enter your email and personal information and then provide a few details about your business.

Completing the questionnaire will ensure your n8n instance is tailored to your specific requirements. Depending on your profile, n8n may offer some additional features for free, sending you an email with a unique licensing key and instructions on how to activate them.
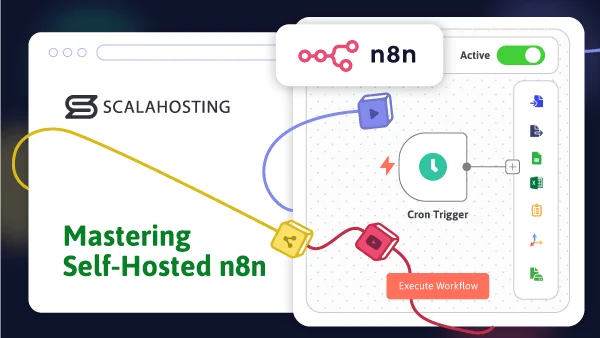
With the license key activated, you can start building your automations. Let’s return to the homepage and check out a basic example of how n8n workflows work.
First, click the Create Workflow button in the top-right corner.

With the + button at the center of your screen, you add the first step. We’ll now set up a simple automation that sends a sample email every five minutes.

After you click the + button, a menu appears on the right that helps you determine what triggers the first action in your workflow. In our case, we need to select the On a schedule option and configure the workflow to start every five minutes.

When you’re ready, you’ll see the Schedule Trigger at the center of the screen. What we need to do now is create an action node to connect to it. When you click the + button, a similar menu appears on the right, allowing you to decide what type of action you want to integrate into the workflow.
In our case, we need the Send Email option. From the first menu, you’ll need to create a new credential featuring your email’s login data and SMTP server. Below that, you need to specify the recipient’s email address, subject, and contents.

Clicking the Execute step button allows you to test whether everything is working correctly. Once you’re ready, you can click Back to Canvas in the top-left corner.
Make sure the Active toggle switch in the top bar is enabled, and with that, you should have your first simple n8n workflow up and running.

How to Install n8n on Linux Manually
If SPanel isn’t available on your server, the installation will inevitably be a bit trickier. Some command-line work is involved, and a bit of technical experience wouldn’t go amiss. However, as long as you follow the steps, you shouldn’t encounter any significant issues.
Here is an n8n self-hosting tutorial to help you with the task:
Method 1: Install n8n via Docker
n8n’s developers recommend using Docker for manual installation of the automation platform on a server. A container provides a clean and isolated environment, eliminating operating system dependencies and conflicts.
The technology also allows you to transfer an n8n instance from one server to another much more easily.
Let’s have a look at the steps:
Step 1: Ensure Docker is installed on your server
Some hosting services come with Docker pre-installed and ready to go. If it is, it’s probably mentioned in the features list, but you can check to be sure by connecting to your server via SSH and running the following command:
$ docker — version
If Docker isn’t available, you’ll have to install it yourself. There are a few ways to configure the platform, but the easiest option is to use Docker’s installation script.
You can download it with the following:
$ curl -fsSL https://get.docker.com -o get-docker.sh
To run the script, use:
$ sudo sh get-docker

With that done, it’s time to set up n8n.
Step 2: Create a new directory for n8n
You need to set up a directory where your n8n instance will run. The commands are:
$ mkdir ~/n8n
$ cd ~/n8n
Step 3: Create a docker-compose.yml file
We’ll use the GNU nano text editor to create the main configuration file that shows Docker how to deploy our n8n container. In it, we specify the n8n image we’ll use. We also configure the networking port, domain name, and communication protocol, and we point Docker to the volume it will use for storing data.
Create the new file with:
$ nano docker-compose.yml
Inside the text editor, paste the following:
version: “3.8”
services:
n8n:
image: n8nio/n8n:latest
restart: always
ports:
– “5678:5678”
environment:
– N8N_HOST=[yourdomain.com]
– N8N_PORT=5678
– N8N_PROTOCOL=https
– NODE_ENV=production
volumes:
– ./n8n_data:/home/node/.n8n
Don’t forget to replace [yourdomain.com] with n8n’s intended application URL. Instead of a domain name, you can set the N8N_HOST value to localhost and access n8n via your server’s IP. However, this isn’t recommended, as you’ll also have to change the protocol to HTTP rather than HTTPS.
You can also use any port you want, as long as it’s allowed by your server’s firewall.

Press Ctrl+x to exit GNU nano and press y to confirm that you’d like to save the changes.
Step 4: Run the n8n container
Finally, Docker can create the n8n container using the settings we entered in the configuration file. The command is:
$ sudo docker compose up

The containerization platform will automatically pull the n8n image and will install it in the new container. When it’s ready, you’ll see the line:
Editor is now accessible via:
yourdomain.com:5678
You can visit the URL and start building your first workflow.
Method 2: Installing n8n via npm
If your server has Node.js, it’s bound to have npm – the default package manager for the runtime environment. It consists of a command-line client and an online database of free and paid packages. The client provides you with access to a wide range of Node.js applications, allowing you to install them with minimal hassle.
n8n is also on that database, and setting it up with npm takes a single command:
$ npm install n8n -g
The npm package manager automatically downloads the automation platform and sets everything up for you. When it’s done, n8n will be available at http://[your server’s IP]:5678.
However, according to n8n’s developers, you should avoid using an npm installation of n8n in a production environment for a range of reasons. Here are a few:
- npm lacks built-in process management.
- Scaling is more difficult compared to Docker.
- Unlike Docker, you don’t get a stable, isolated environment.
- You have to manage Node.js versions manually.
- There’s a risk of conflicts after applying updates and installing other packages.
- Databases, backups, and SSL certificates are all set up and managed manually.
In other words, npm gives you an easy method for deploying and testing n8n. Still, if you want to use the automation platform in a production environment, you’re better off picking another option.
Post-Installation Setup and Best Practices
Once n8n is installed and running, your main focus will be on building workflows that streamline your business operations. However, to take full advantage of n8n’s features, there are a few things to keep in mind. Let’s walk through them:
- SSL certificate
Any website or online application must be protected by an HTTPS connection these days. Your n8n instance is no exception. When communicating with n8n, users enter login credentials, API tokens, and other sensitive information. You want to ensure it passes through an encrypted connection.
If you use SPanel, you won’t need to worry about it at all. Our server management system automatically installs a free Let’s Encrypt SSL certificate on all your domains and subdomains as soon as they’re pointed to the correct IP. Everything is configured on your behalf, and all you need to do is ensure that the lock sign is present in your browser’s address bar when you open your n8n instance.
- Backups
Backups are critical for ensuring your workflows are reliable. If they aren’t included in your hosting plan, you’ll need to implement a robust backup strategy that protects your data.
With a ScalaHosting cloud VPS, you won’t need to worry about any of this, as all our managed solutions come with daily offsite backups included by default.
- Monitoring and inspecting logs
n8n’s logs are pretty extensive, especially when the automation tool is deployed in a Docker container. They’re located in the n8n_data folder inside the application directory, and if you think your automations are not working, your first port of call should be to look there.
If you’re having trouble finding or understanding them, you can always ask your host’s support team for guidance.
- Scaling
You need to ensure n8n has enough hardware resources at all times to perform all automations and executions smoothly and flawlessly. On the one hand, this means choosing a hosting service with flexible upgrade options that allow you to adjust the hardware configuration as and when needed. On the other, it means taking advantage of these options before your automations start to suffer.
If you use SPanel, you can see at any time how much processing power, memory, and storage you’re using through the Admin Interface’s homepage. This allows you to monitor the load and determine when an upgrade may be necessary.
Conclusion
Installing n8n on a server sounds like a bit of a challenge, especially if your technical experience is somewhat limited.
The truth is, there’s nothing too complicated about the process. And if you use an SPanel-powered server, it’s actually a ten-minute job that requires little more than a few mouse clicks.
FAQ
Q: How can I install n8n locally using Docker?
A: The best approach to installing n8n on a local desktop or laptop computer is to use Docker Desktop. It’s available for all major operating systems, and it offers a point-and-click interface with direct access to the n8n Docker image. Downloading and deploying the automation tool takes exactly two mouse clicks.
Q: Can I self-host n8n?
A: Unlike many other automation platforms, n8n is fully open-source. This means you can download and deploy it on any device you want without paying licensing fees or signing up for specific services.
Q: Is n8n suitable for beginners?
A: You don’t need any advanced technical skills to use n8n. Workflows are built around trigger and event nodes that follow specific logic. The nodes are represented in a graphical user interface and can be dragged and droppedped to perform their specific functions.